Designing embroideried swatchbook for programming beginners.
Learning with Turtles Introduction
Learning with Turtles Introduction
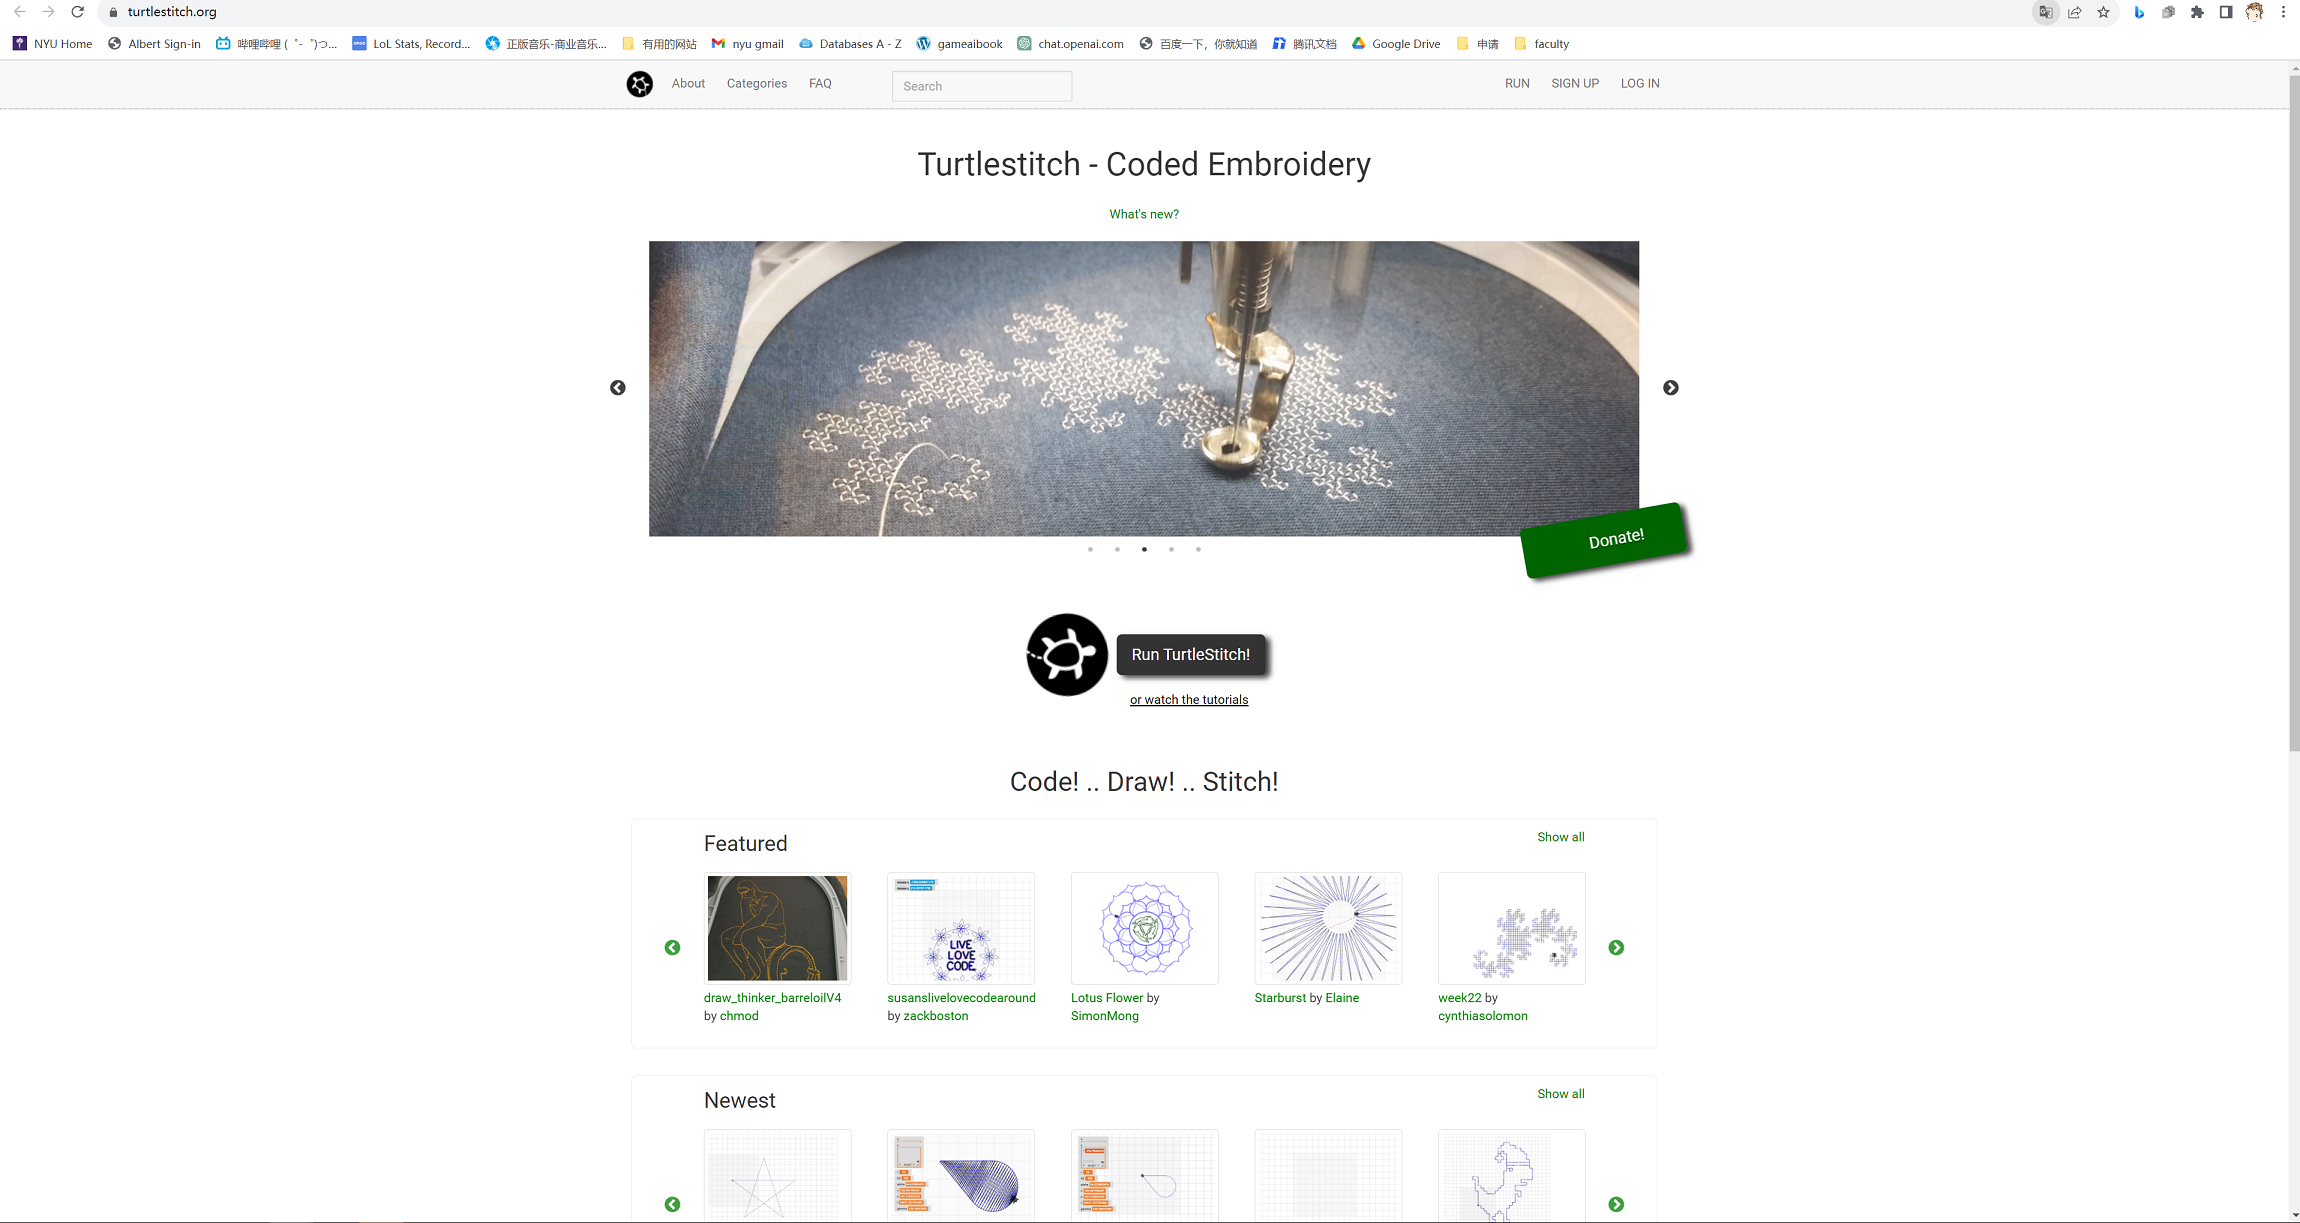
"Learning with turtles" is a course provided by NYU Shanghai in the Interactive Media Art department. In this course, "turtle" refers not to the animal but rather to a useful tool designed to assist beginners in learning about programming and computational thinking. At the onset of this course, we delved into "Mindstorms: Children, Computers, and Powerful Ideas," a book authored by Seymour Papert, the founder of turtle graphics. After grasping the concept of computational thinking, we began using "turtle" to craft our own patterns on Turtlestitch, centered around the theme of "turtles and nature." Turtlestitch is a website that transforms turtle patterns into a special file readable by embroidery machines, allowing us to produce the patterns using an embroidery machine. For our project, we utilized Singer's future embroidery machine to complete all embroidery aspects. We extend our gratitude to NYU Shanghai for providing us with this remarkable machine and introducing us to a new dimension of programming in our lives.
It is my first time creating embroideries through computer programming language. The tangible outcome of a stitch makes programming more accessible to the general population, rendering it more intriguing than ever before. I firmly believe that not only children but also older adults would find turtle programming interesting. Turtle significantly reduces the programming threshold, unveiling the magical realm of coding to everyone.
I am delighted to have the opportunity to document the entire process of crafting a swatch book with Turtlestitch and our class. In this documentation, I aim to provide you with a glimpse into using turtle to program a pattern, generating stitches from the script, designing the book cover, and ultimately creating a stitch swatch book.
Programming and Pattern design
Programming and Pattern design
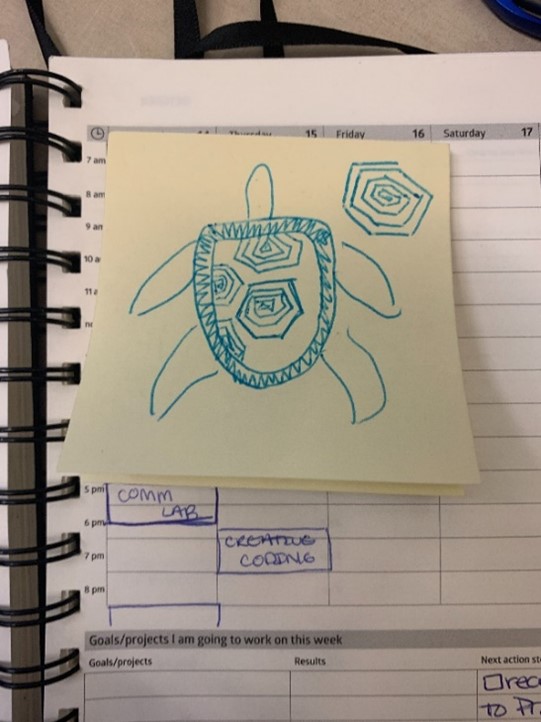
It is straightforward to align the theme "Turtle and Nature" with the actual animal turtle, inspiring us to name our group "naturestitch." Our goal is to create a turtle pattern using Turtlestitch. Our group consists of three members: Cole Abram, Alex Pochomulloev, and myself. Unfortunately, due to the ongoing pandemic, Cole and Alex, as remote students, are unable to be physically present in Shanghai. Moreover, Alex faced challenges with internet connectivity, limiting his contribution during the initial stages of pattern design. Despite these obstacles, Cole initiated the design process by sketching the draft of the turtle before coding. To streamline the coding process, we decided to divide the tasks, with Cole handling a portion of the design, and I taking on half of the programming process. Regrettably, I am the only member able to physically stitch out the designed pattern and create the final book for this project. We are utilizing Turtlestitch for pattern design, and before delving into coding, Cole provided the initial draft of the turtle, depicted in the above.
Turtle's Outline
Turtle's Outline
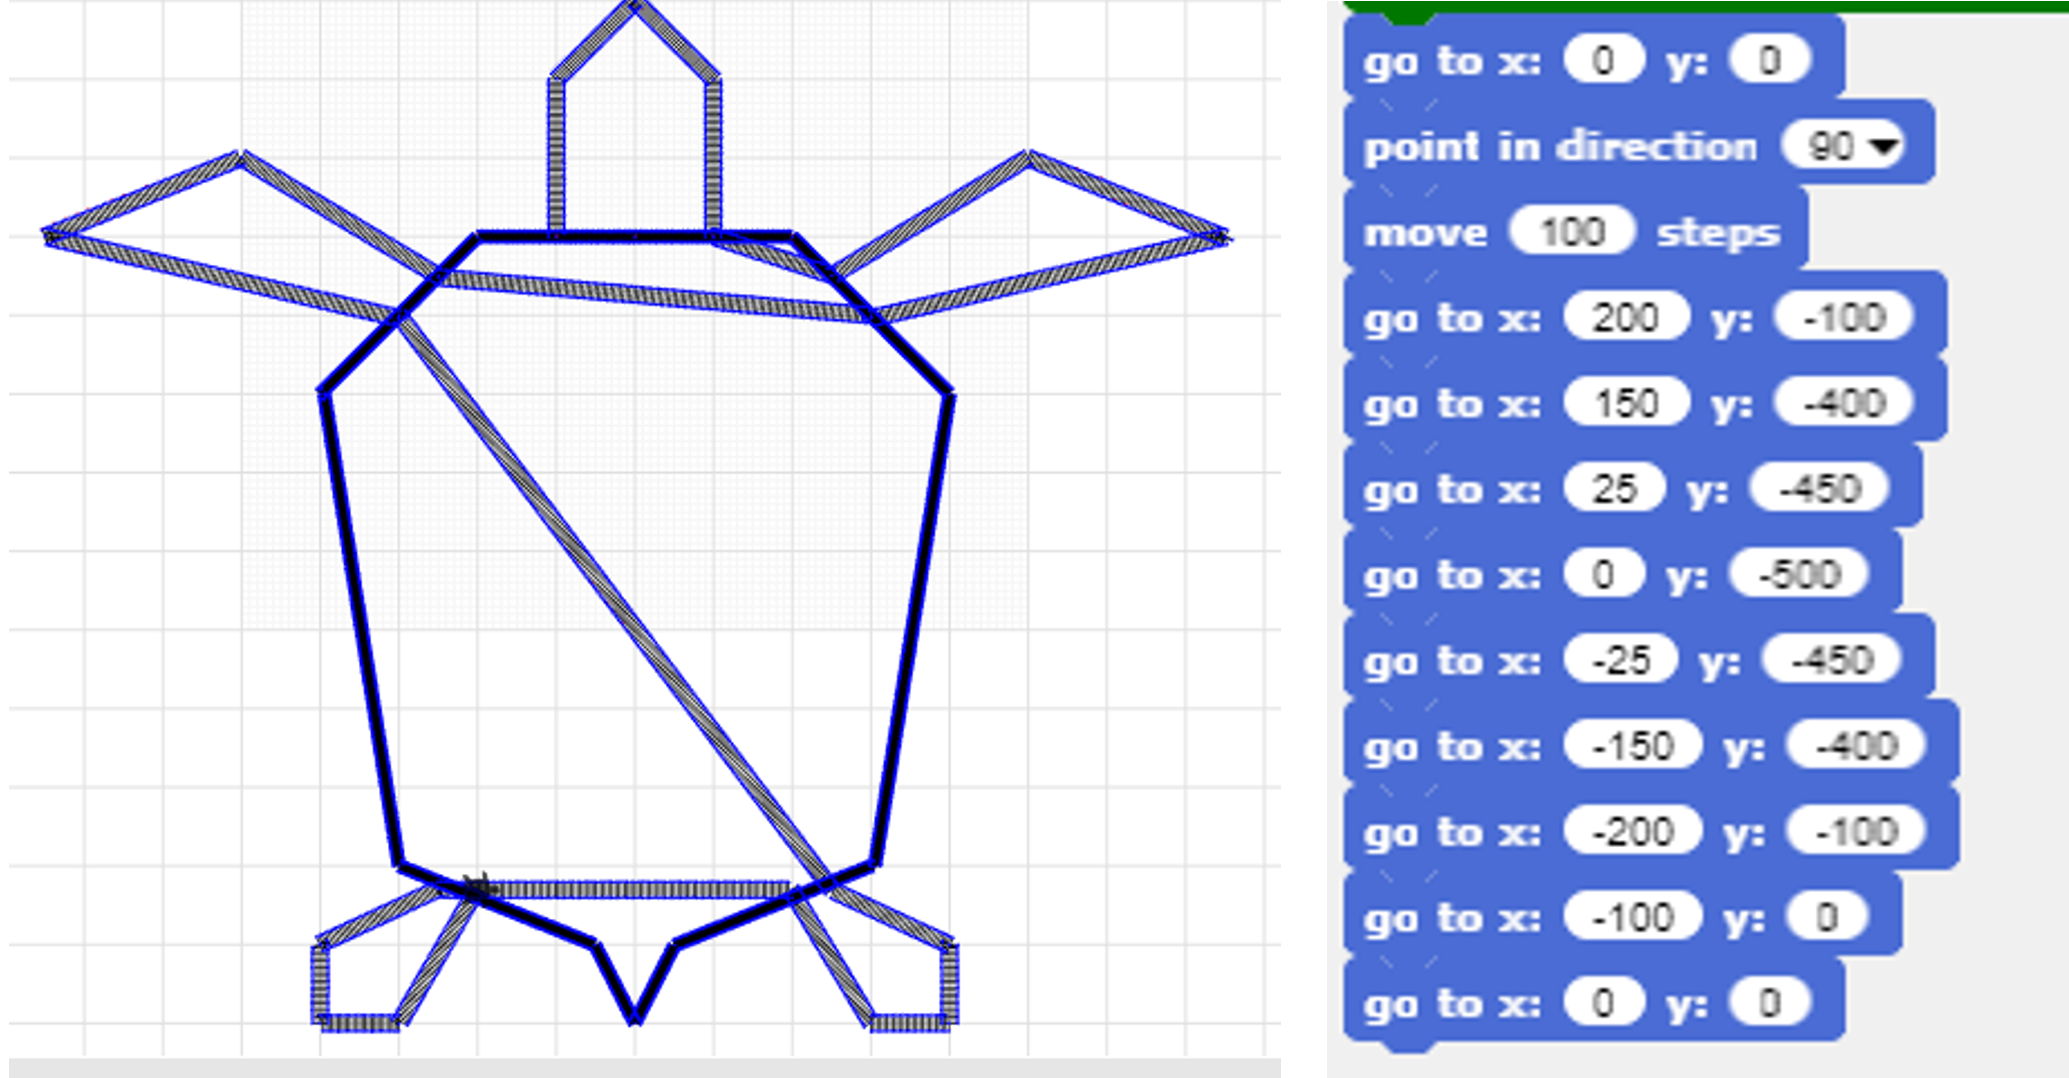
In this turtle design, we opted to commence with outlining the turtle, followed by filling it with spirals. Cole took charge of the outline portion, employing absolute positioning to precisely dictate how the turtle should draw the lines. The code prominently features the "go to (x, y)" block, as evident in Figure above, showcasing Cole's meticulous efforts in determining the exact positions for creating a well-defined turtle outline.
However, it became apparent that the code, while visually accurate, wasn't optimized for machine stitching. Certain lines in the code were unnecessary for the stitching process. Due to Cole's limited access to the embroidery machine, she wasn't aware of what would be stitched out with these lines. Consequently, I had to edit some of her code to streamline my stitching process and ensure adequate space for the inner spirals.
Editing the Code with Jump Stitches
Editing the Code with Jump Stitches
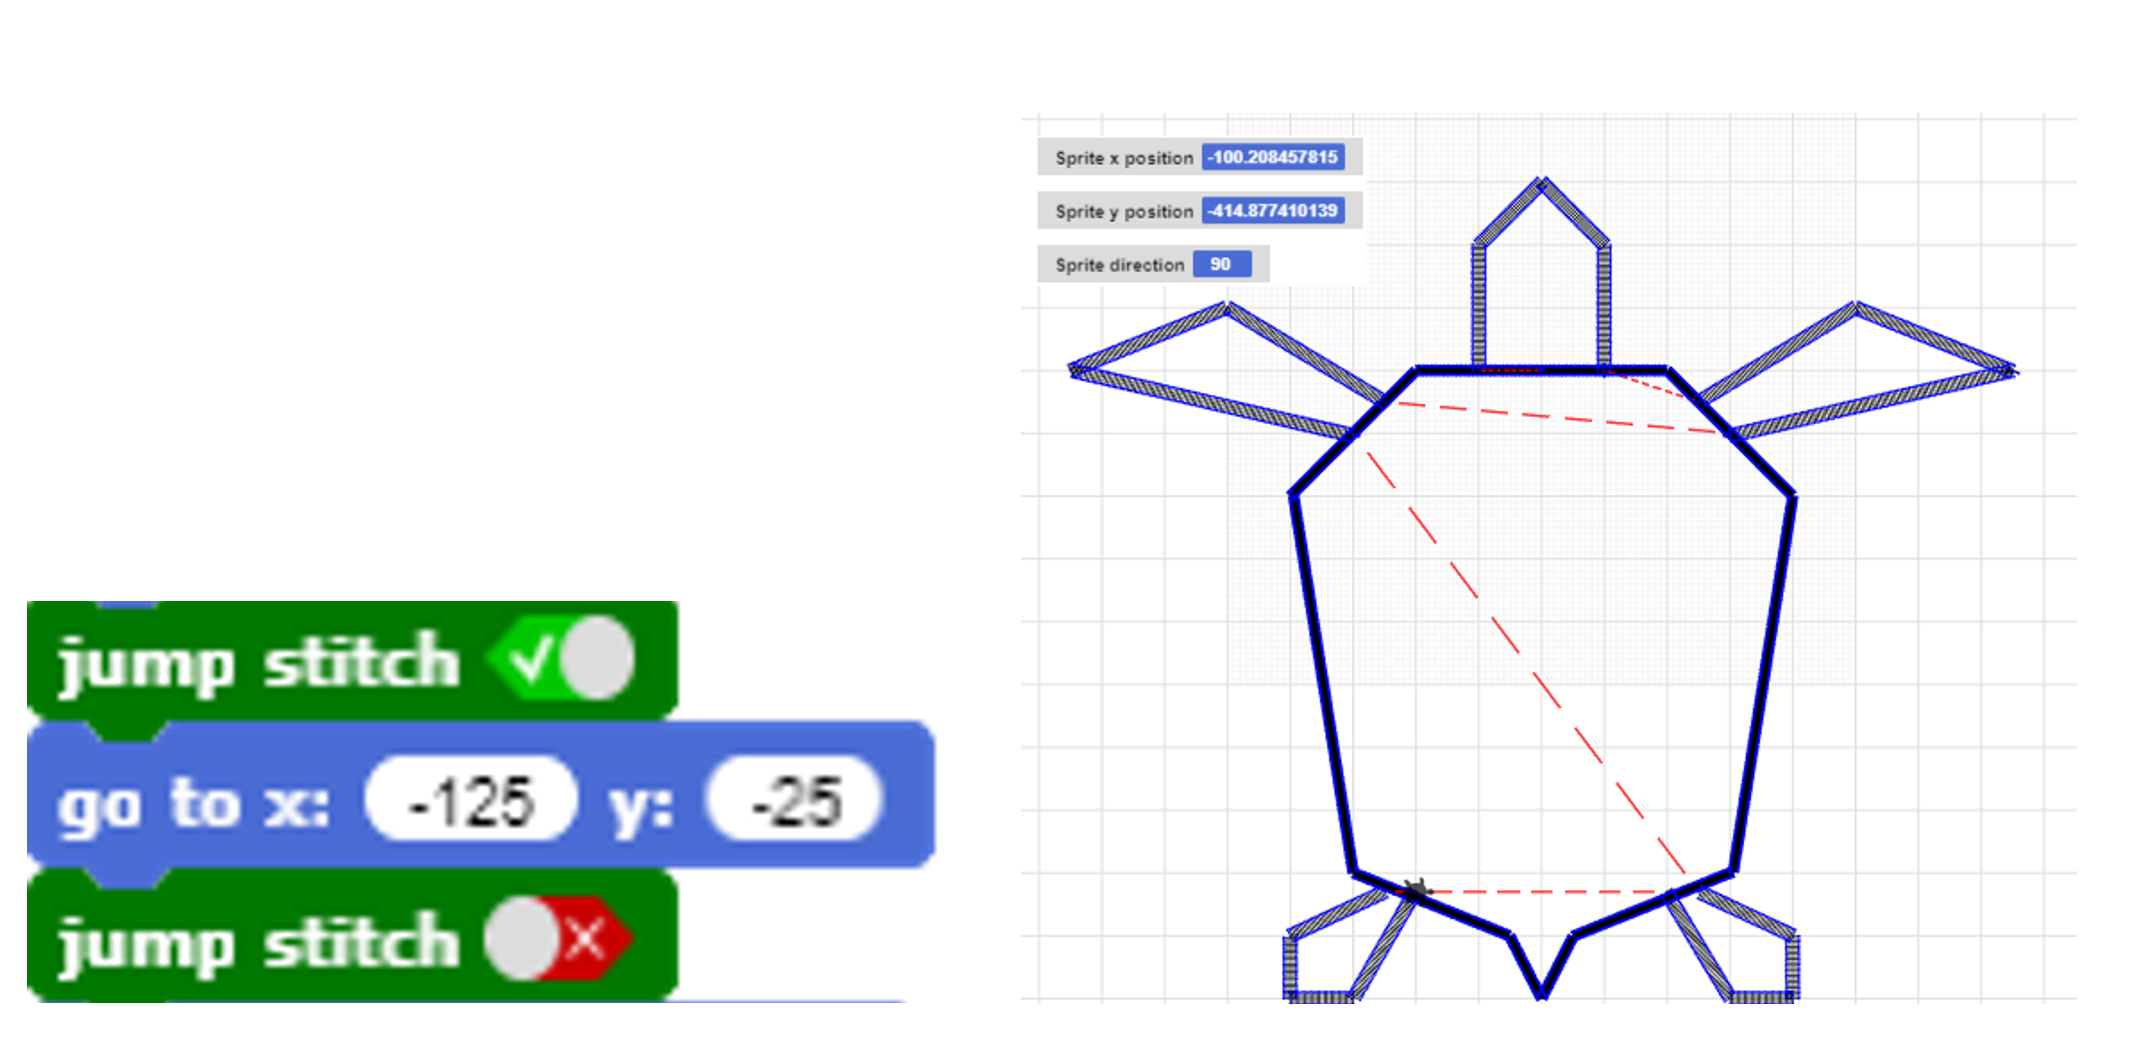
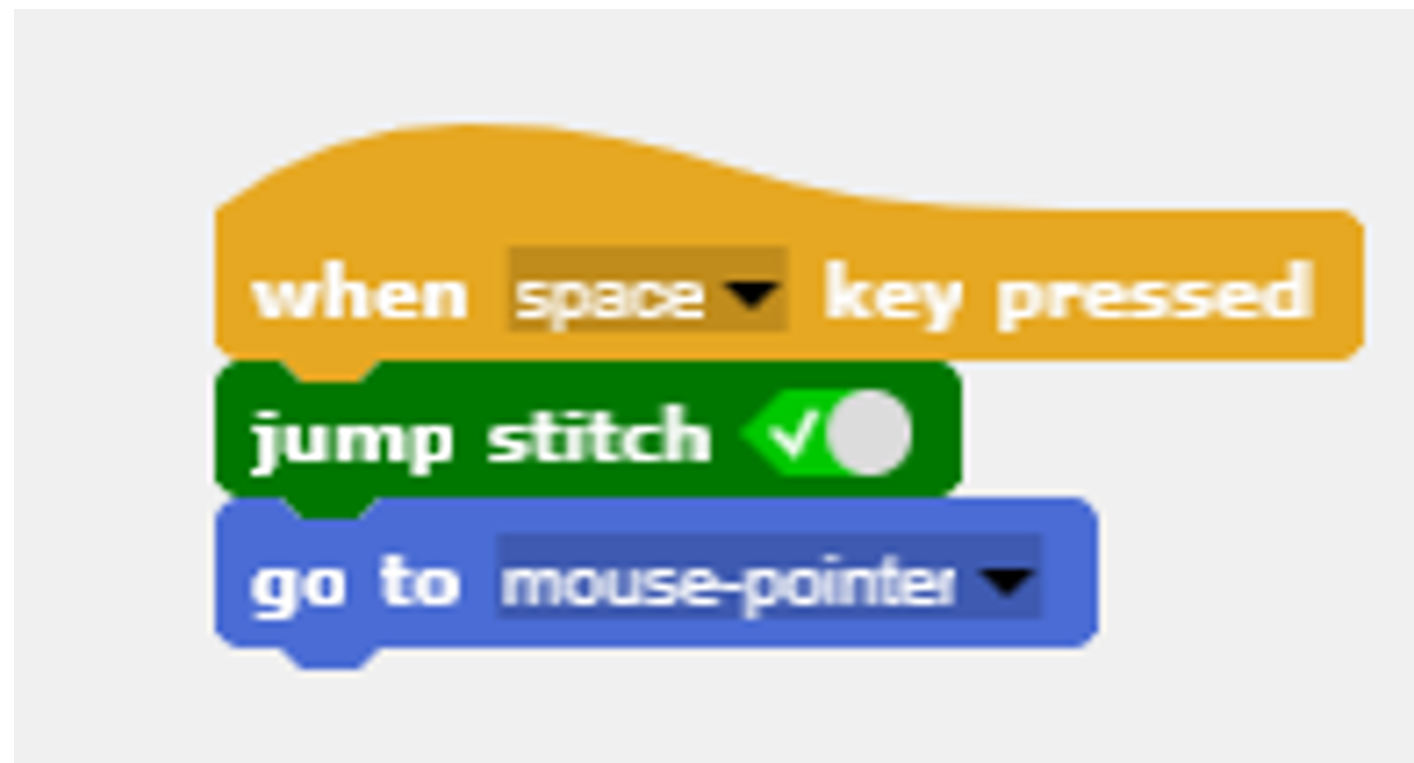
Using the jump stitch block is the main technique to edit her code. After drawing a part of the turtle, the line between the end point and the next starting point should be a jump. Then, after machine stitching, the weeding process is much easier. The weeding process involves removing every unnecessary thread on the pattern, which I will discuss in detail later. My edits are shown in figure above. As you can see, I just added jump stitch blocks to turn some unnecessary stitches into jump stitches.
Inner Decoration: Pentagonal Spiral
Inner Decoration: Pentagonal Spiral
After the final draft of the turtle’s outline, the next step is to add the inner decoration. Unlike Cole's codes, I utilized a for loop and relative positioning to draw the spirals. Additionally, I aimed to create a pentagon-like spiral instead of a circular one.
To achieve this, I employed the method of adding to draw the spiral. I initialized a variable "i" starting from 1, representing the number of repetitions to move a certain distance. The side of the spiral increments with this specific distance. While drawing a spiral is not overly challenging, positioning it accurately can be tricky.
For positioning, I made an approximate guess and used the "press key" block to determine the next position where my mouse pointer would land. The press key block is depicted below in Figure above and below. I recorded the x and y position data and calculated the move distance.

Spiral Thickness: Initial Attempt with Tatami Stitch
Spiral Thickness: Initial Attempt with Tatami Stitch
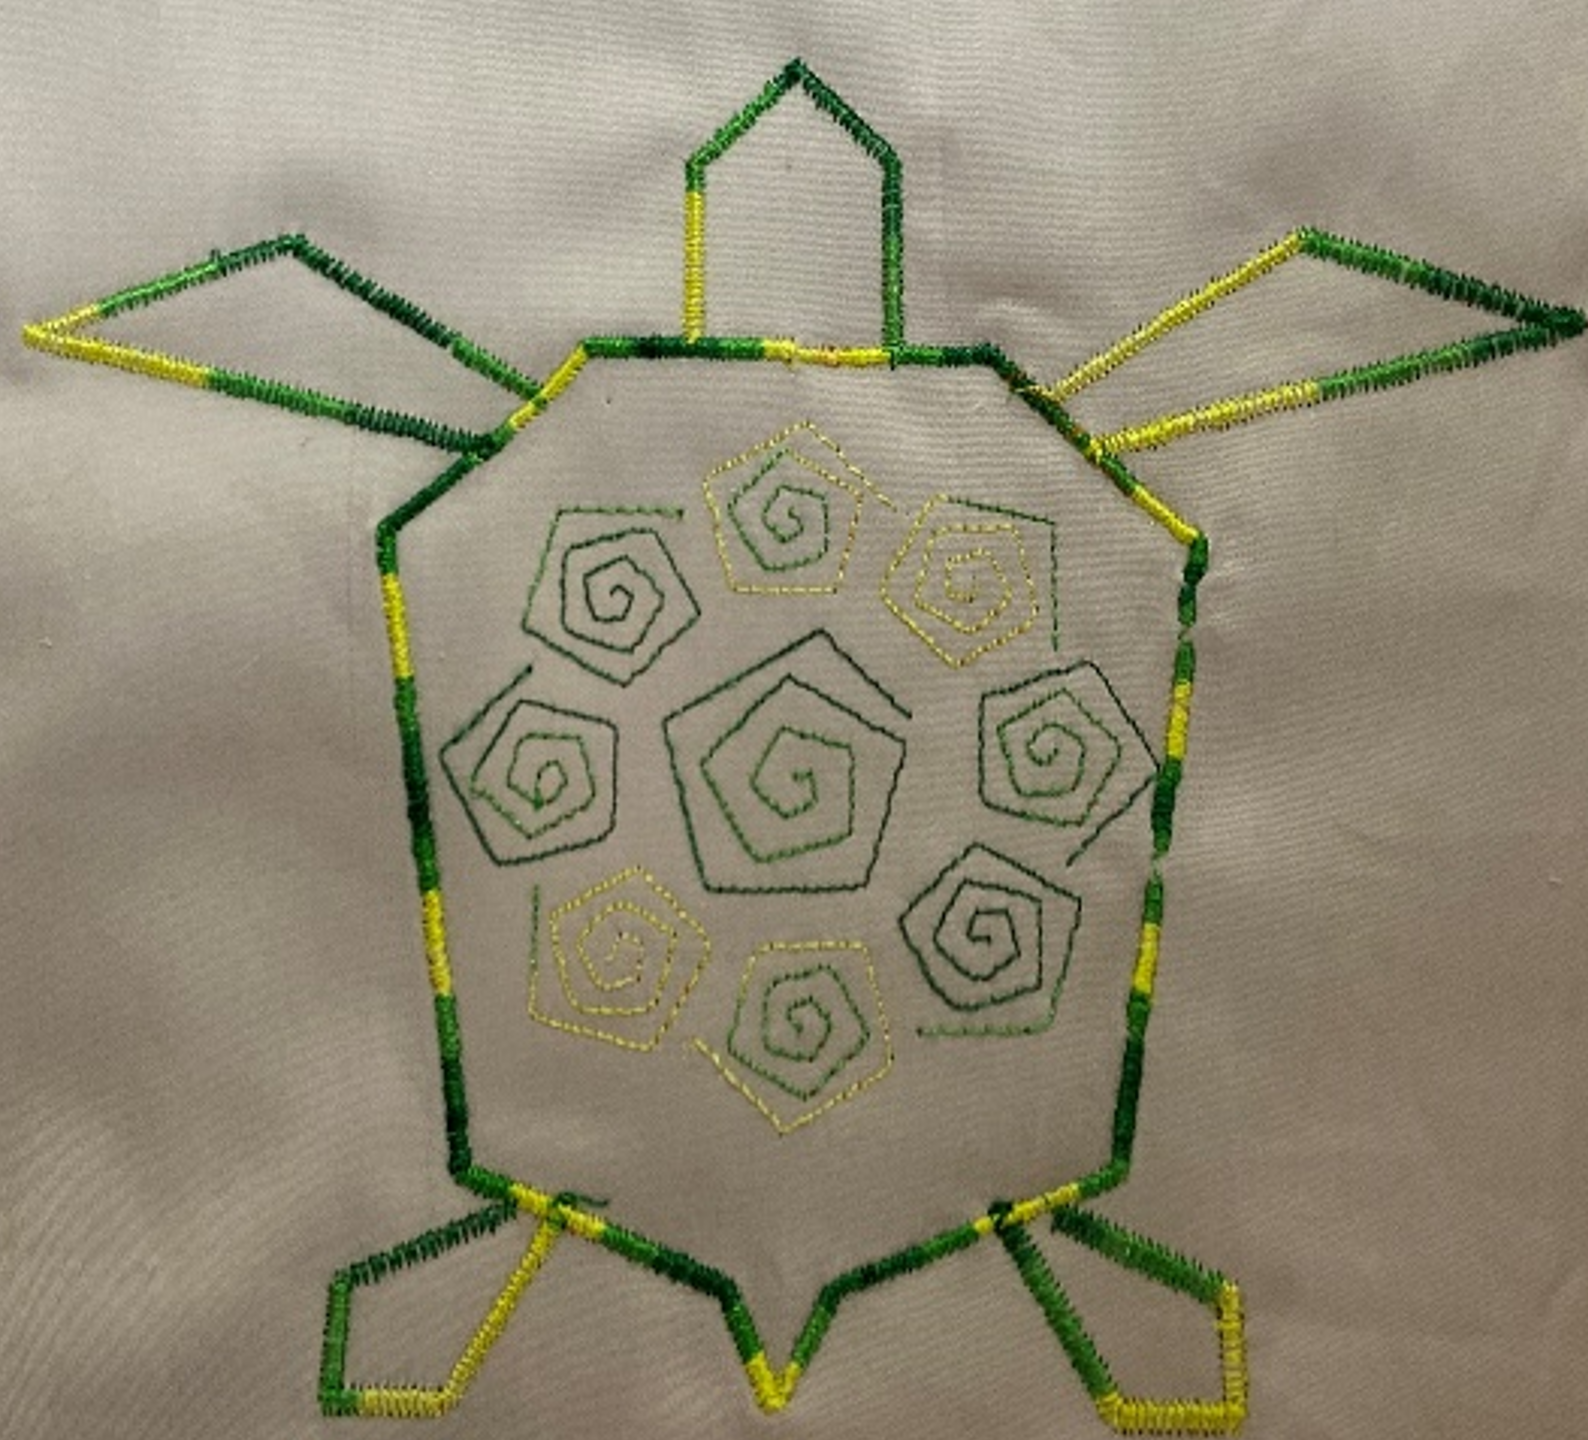
In the first version of the spiral, I chose to use tatami stitch to make the spiral line thicker. However, as shown in Figure below, the spirals appear very thin.
Sun Variation Design
Sun Variation Design
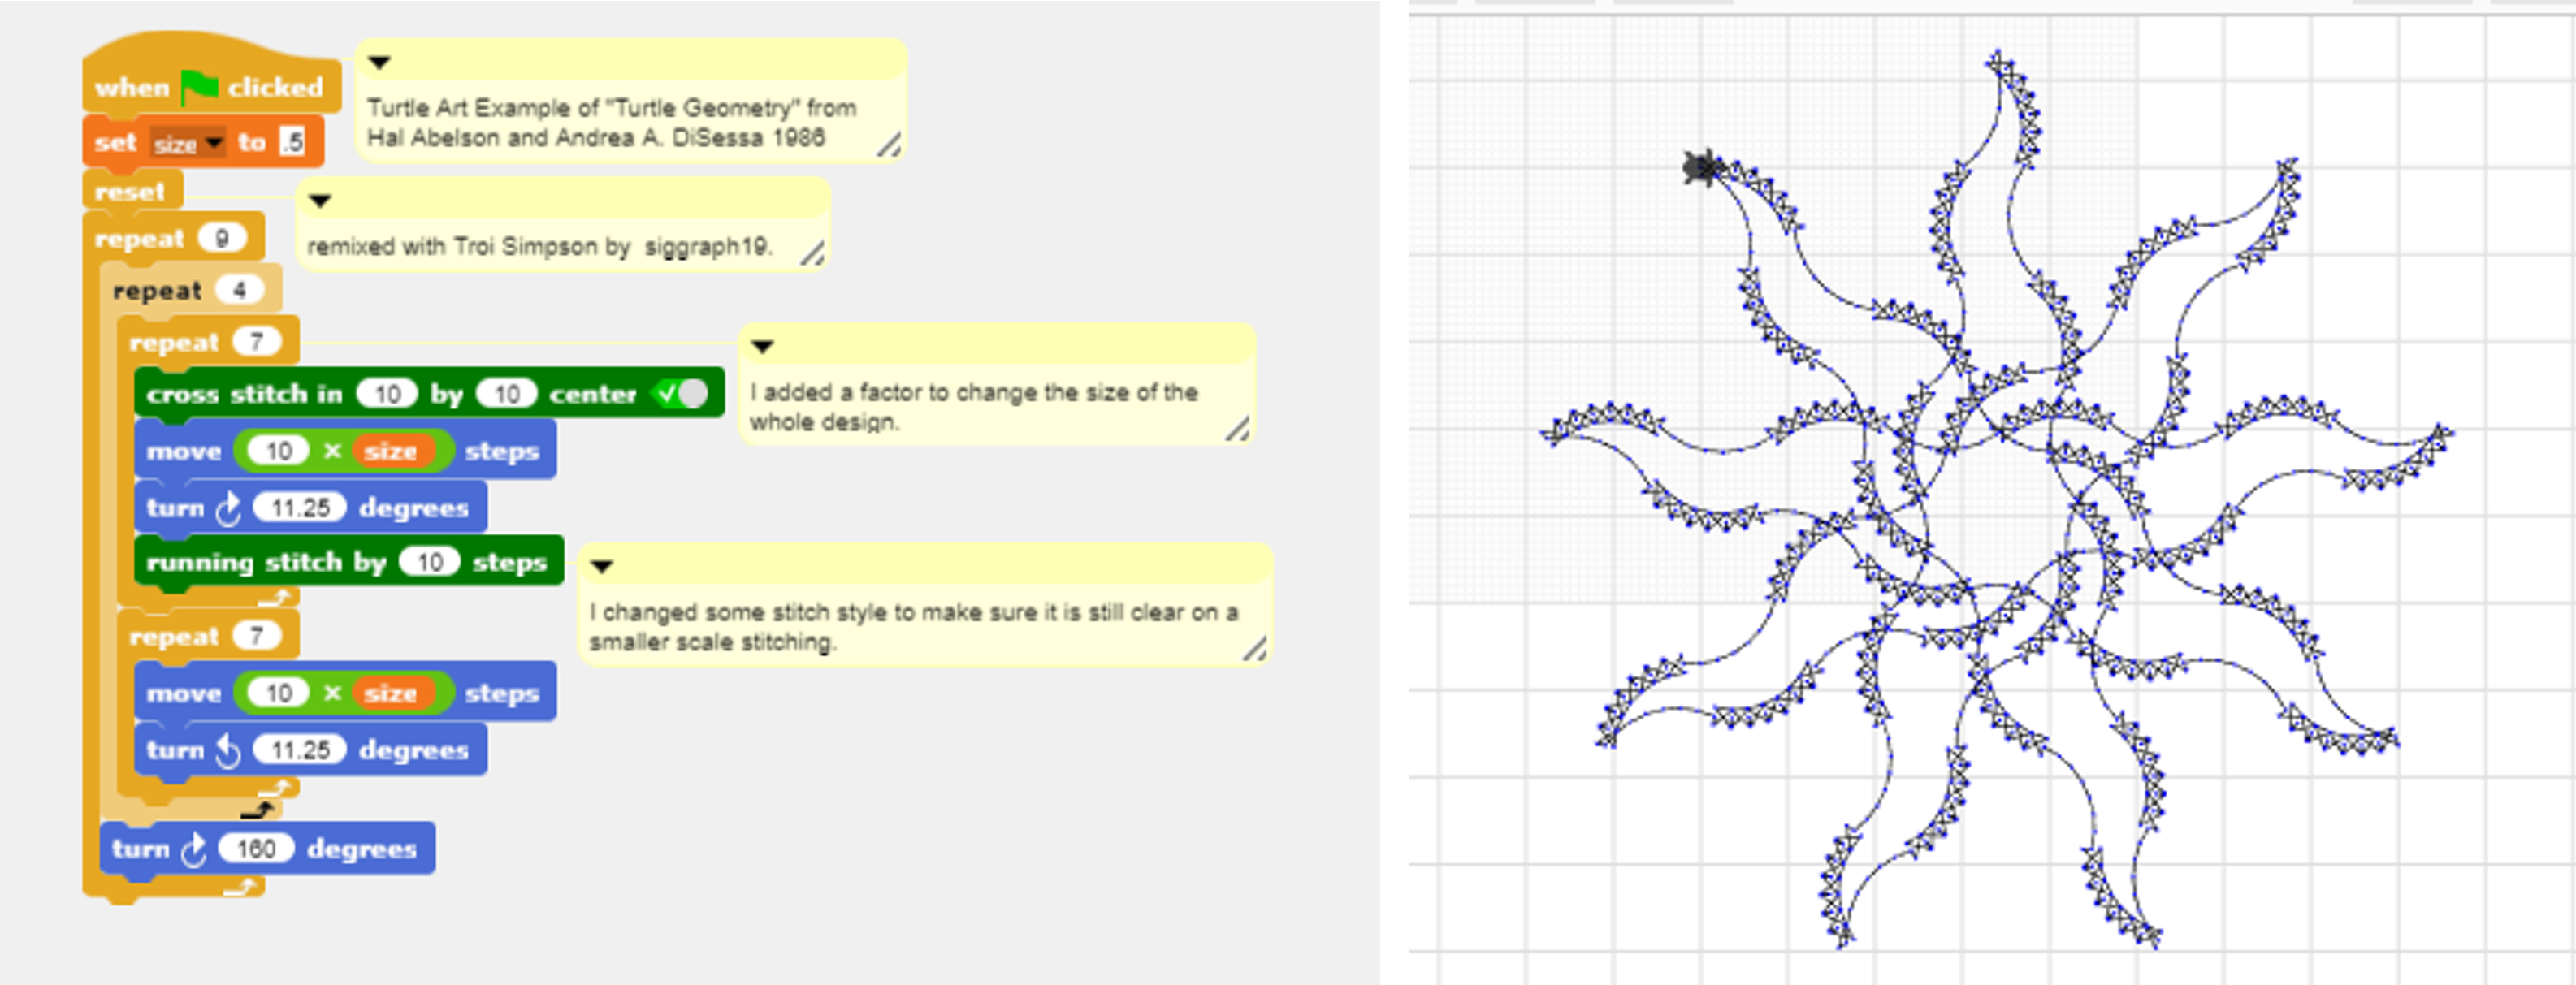
Due to the size constraint of a stitch page (18.5 cm * 33 cm), I needed to add more designs. One additional design is called "Sun Variation," inspired by a Turtle Art Example of "Turtle Geometry" from Hal Abelson and Andrea A. DiSessa (1986). I admire its design, and after some edits of Troi Simpson's code from siggraph19, I created a remixed design.
I stitched it in cross-stitch mode to ensure the thicker lines worked well. The code below represents my final draft. The initial attempt of this sun variation design used the "think line" block, but it was challenging to differentiate between the thicker line and the thin line. Despite initially planning to replace this design if Alex provided an alternative, I decided to keep the sun variation with some minor edits since he did not send any design.
The first draft of this design will be shown later in this document.
Square Spirals for Stitch Page Outline
Square Spirals for Stitch Page Outline
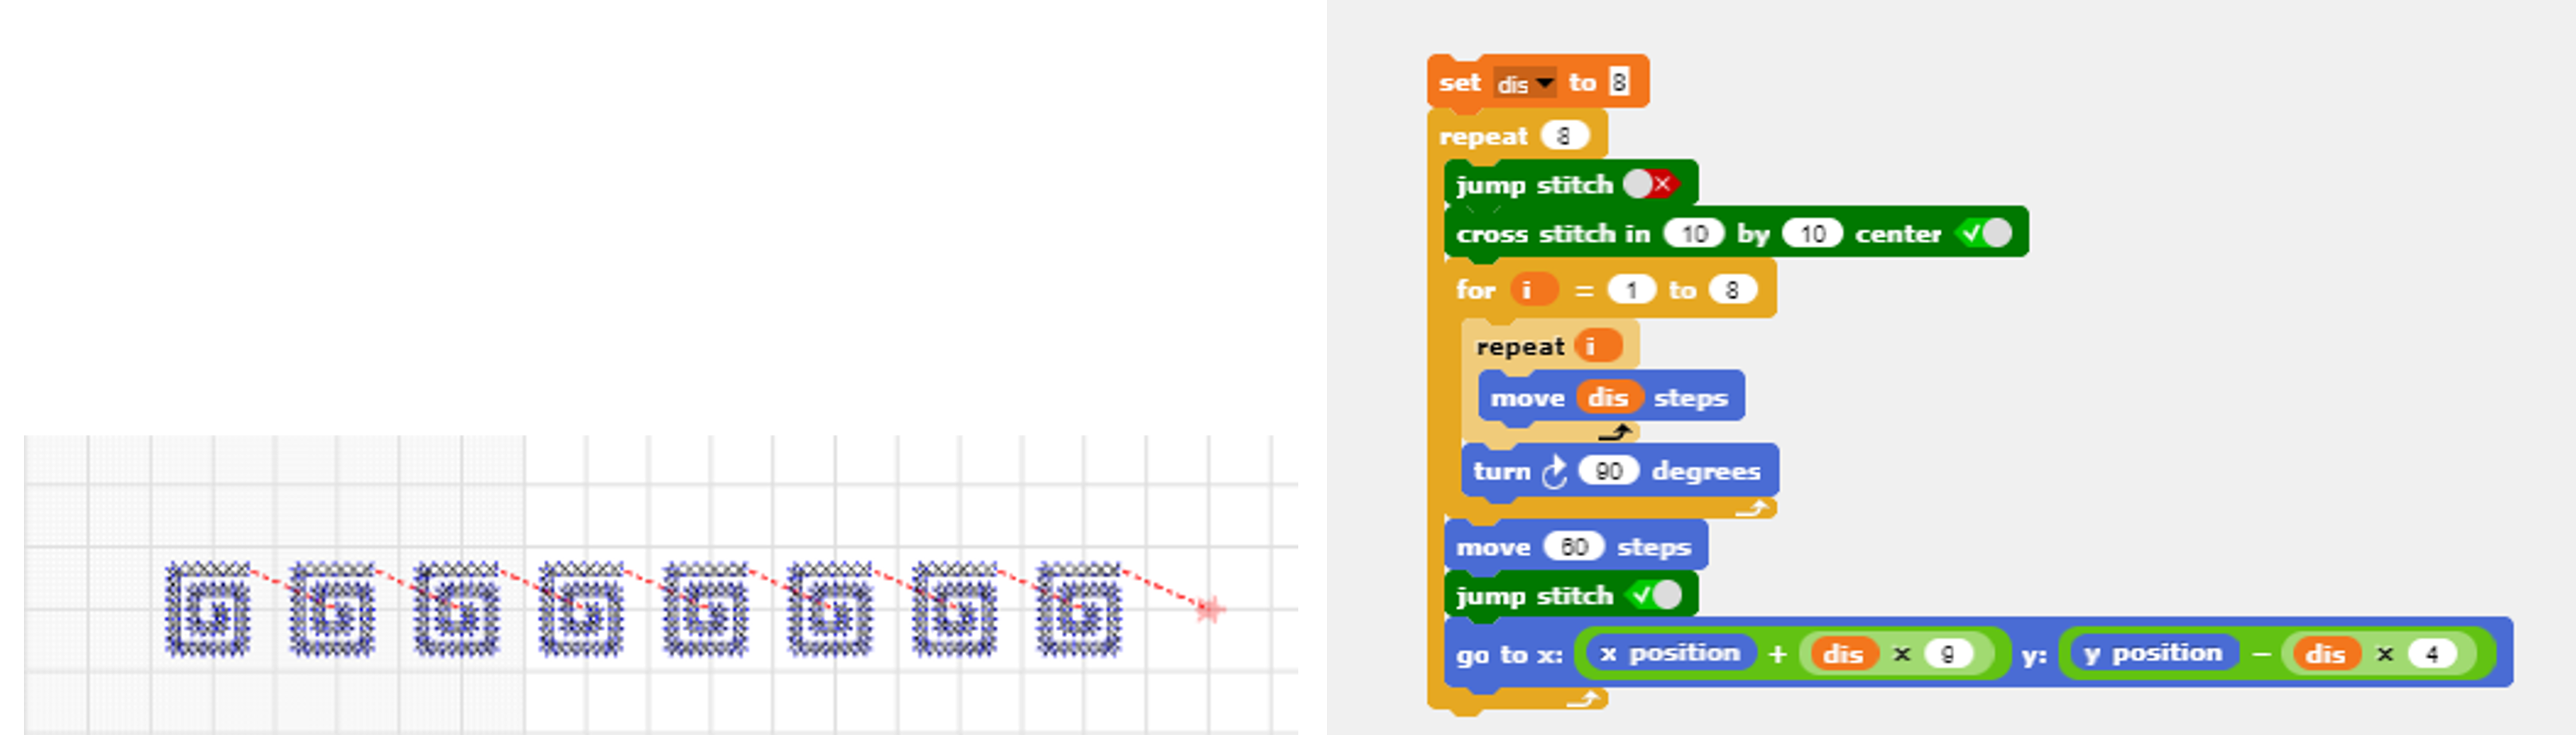
I wanted to enhance the outline of the stitch page, so I added more spirals, specifically square spirals arranged in a line. I used loops in this spiral drawing, as I find spirals interesting to embroider.
Embroidery Process: Machine and Materials
Embroidery Process: Machine and Materials
After completing the design and coding part of the page, the next step is embroidering the design using the machine provided by NYU Shanghai, the SINGER Futura XL-550. The challenges in this process become evident once you start. The first challenge involves understanding the materials. Various types of cloth are suitable for stitching, each requiring an appropriate stabilizer. Through several tests, I discovered that softer materials are best with hard stabilizers, while harder materials can work with all kinds of stabilizers. The stabilizers and stitching hook help flatten the cloth, allowing the machine to embroider at the correct positions and create the expected pattern.
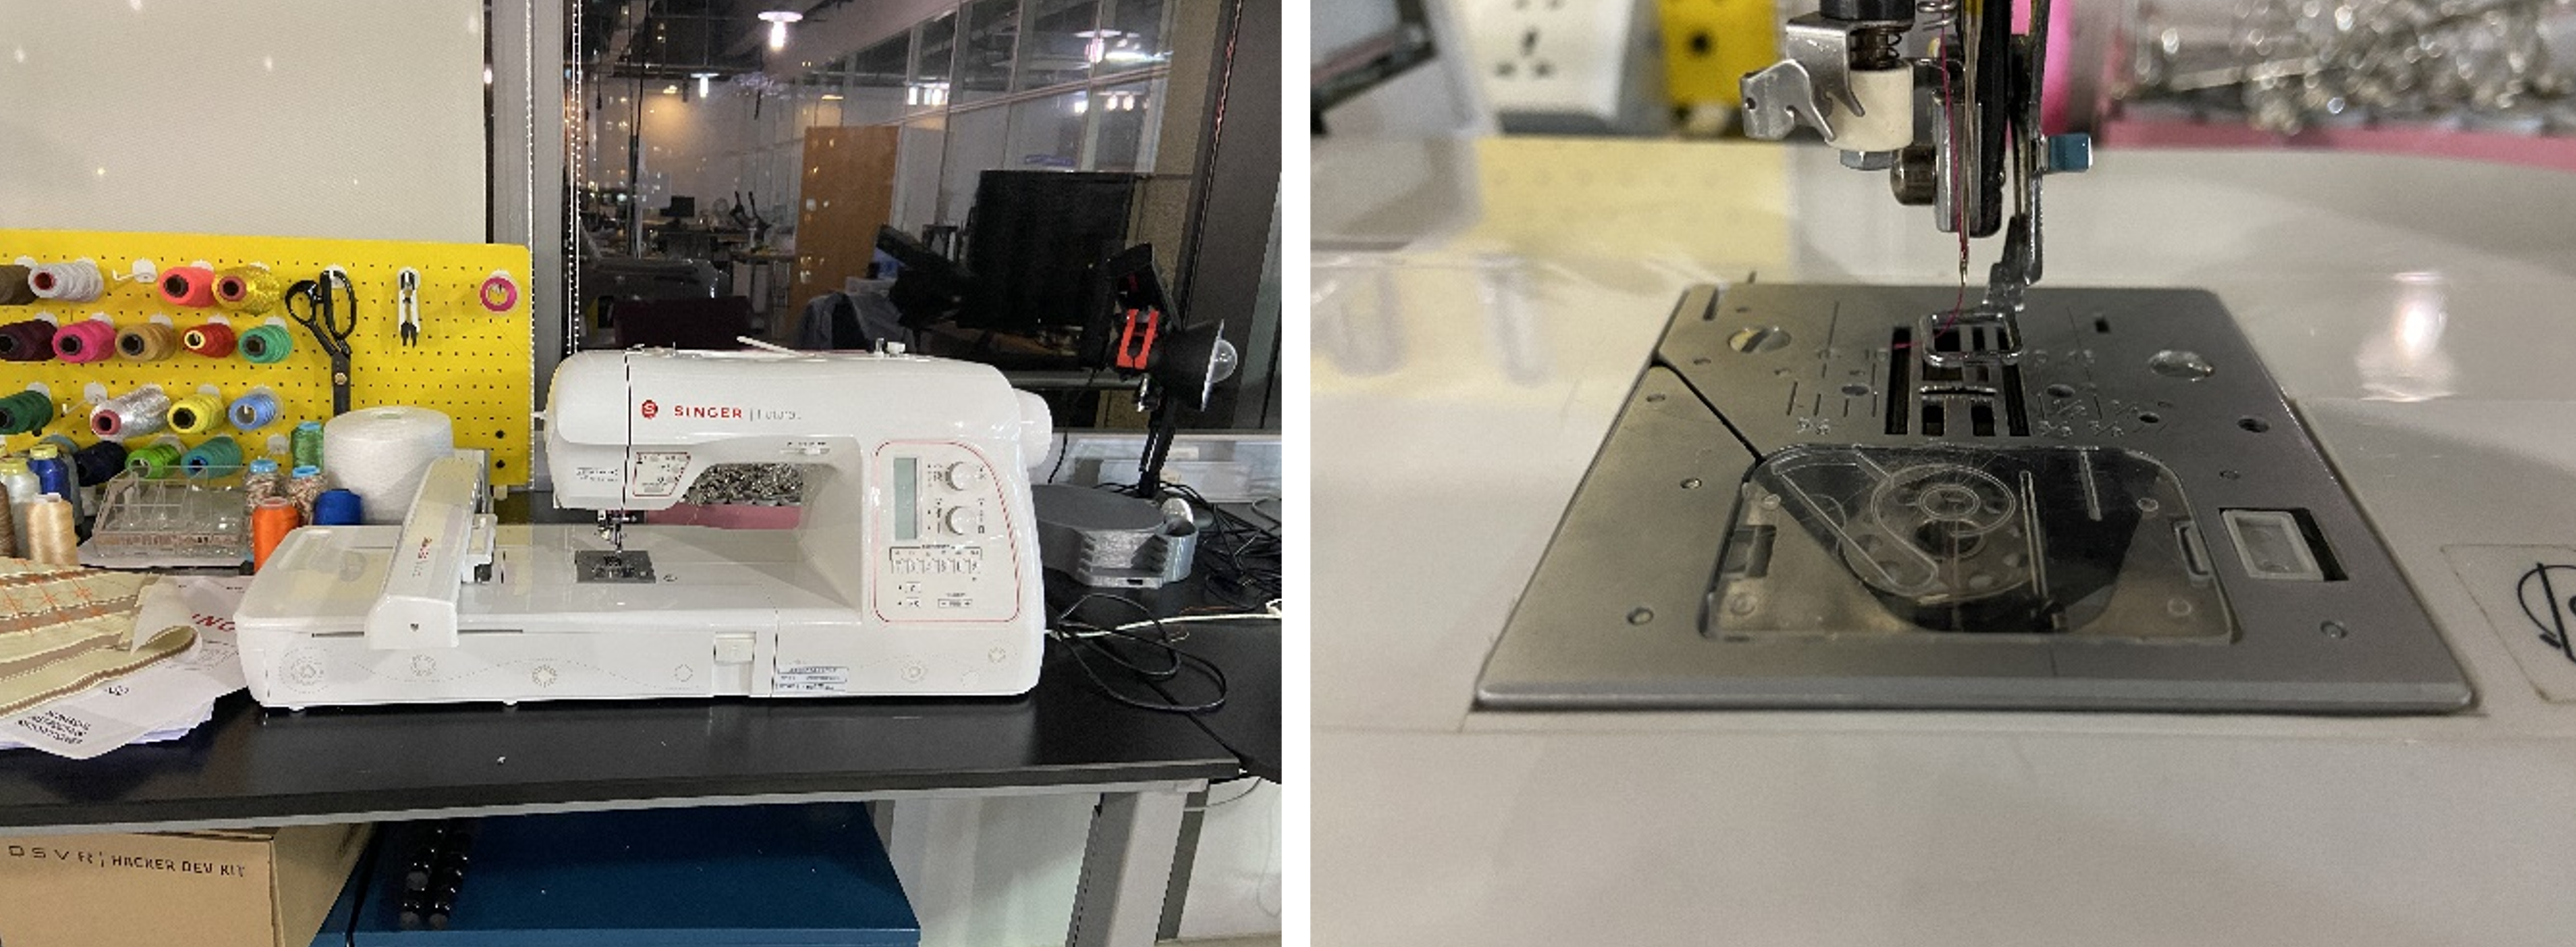
Thread Tension Challenges
Thread Tension Challenges
After selecting the appropriate fiber and stabilizer, the next step is to choose the thread colors for both the top and bottom threads. The embroidery machine's mechanism involves the top thread knotting with the bottom thread equally. Consequently, on the front of the stitch page, only the top thread is visible, while the bottom thread is on the back. However, achieving this balance is highly dependent on the tension of both the top part of the machine and the bobbin at the bottom.
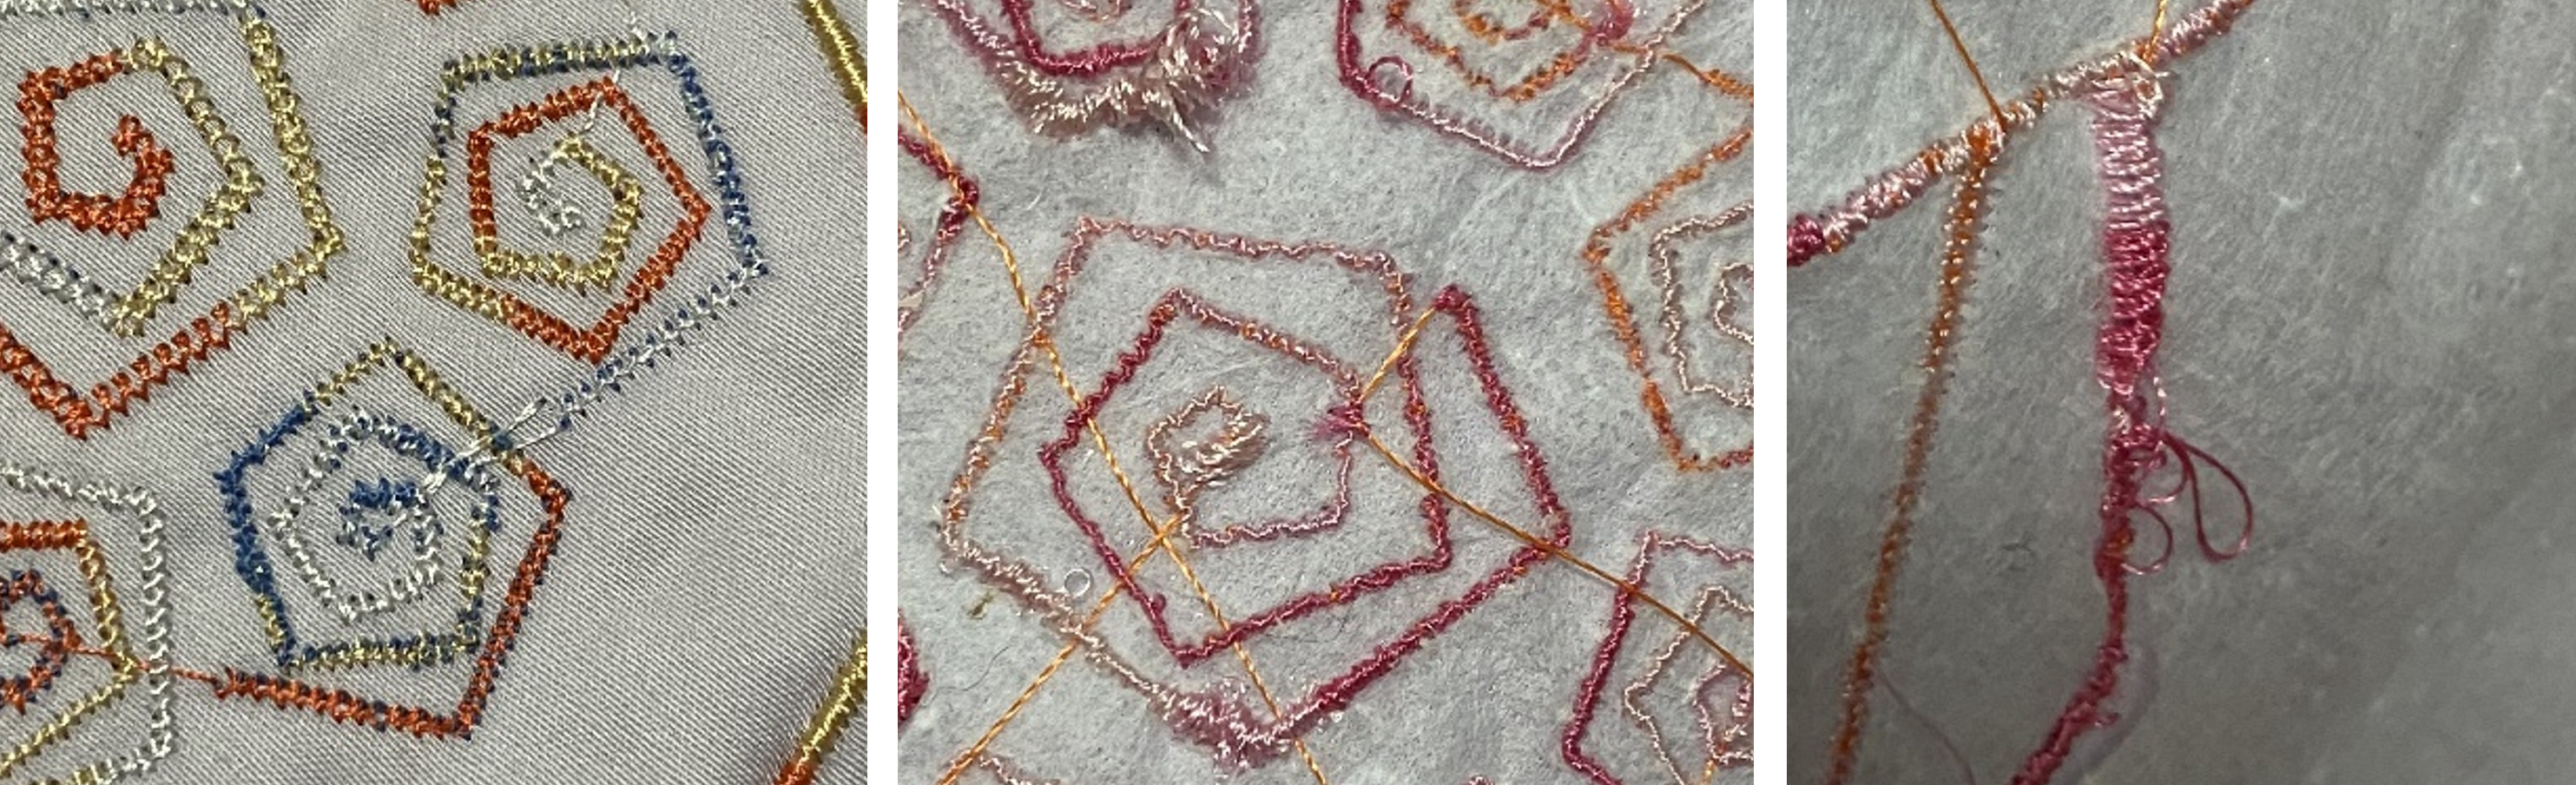
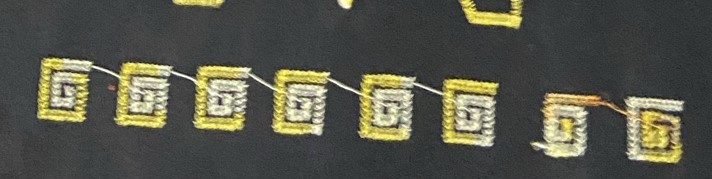
Typically, achieving perfect tension is challenging. In the first picture in Figure below, the bottom thread is visible on top of the stitch due to high top tension, pulling the bottom thread out. The second picture is caused by low top tension and high bottom friction. The third one is caused by loose top thread. Identifying and troubleshooting these issues can be a challenge.
Embroidery Adjustment: Design Refinement
Embroidery Adjustment: Design Refinement
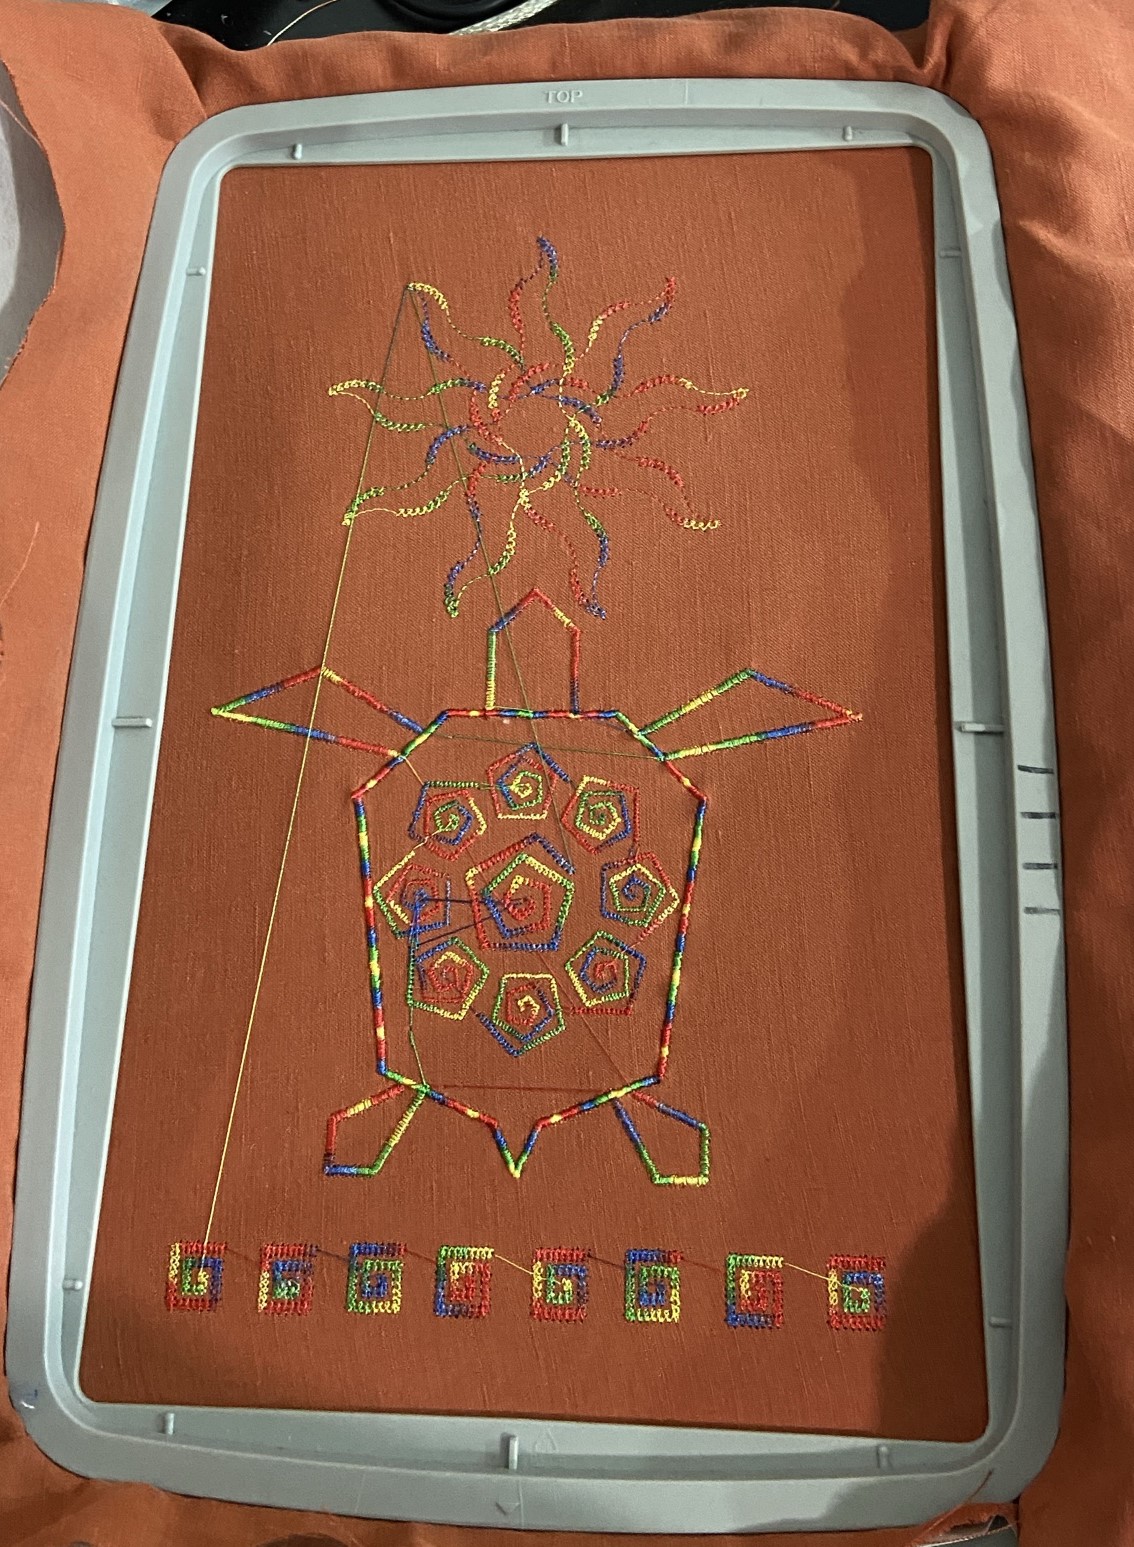
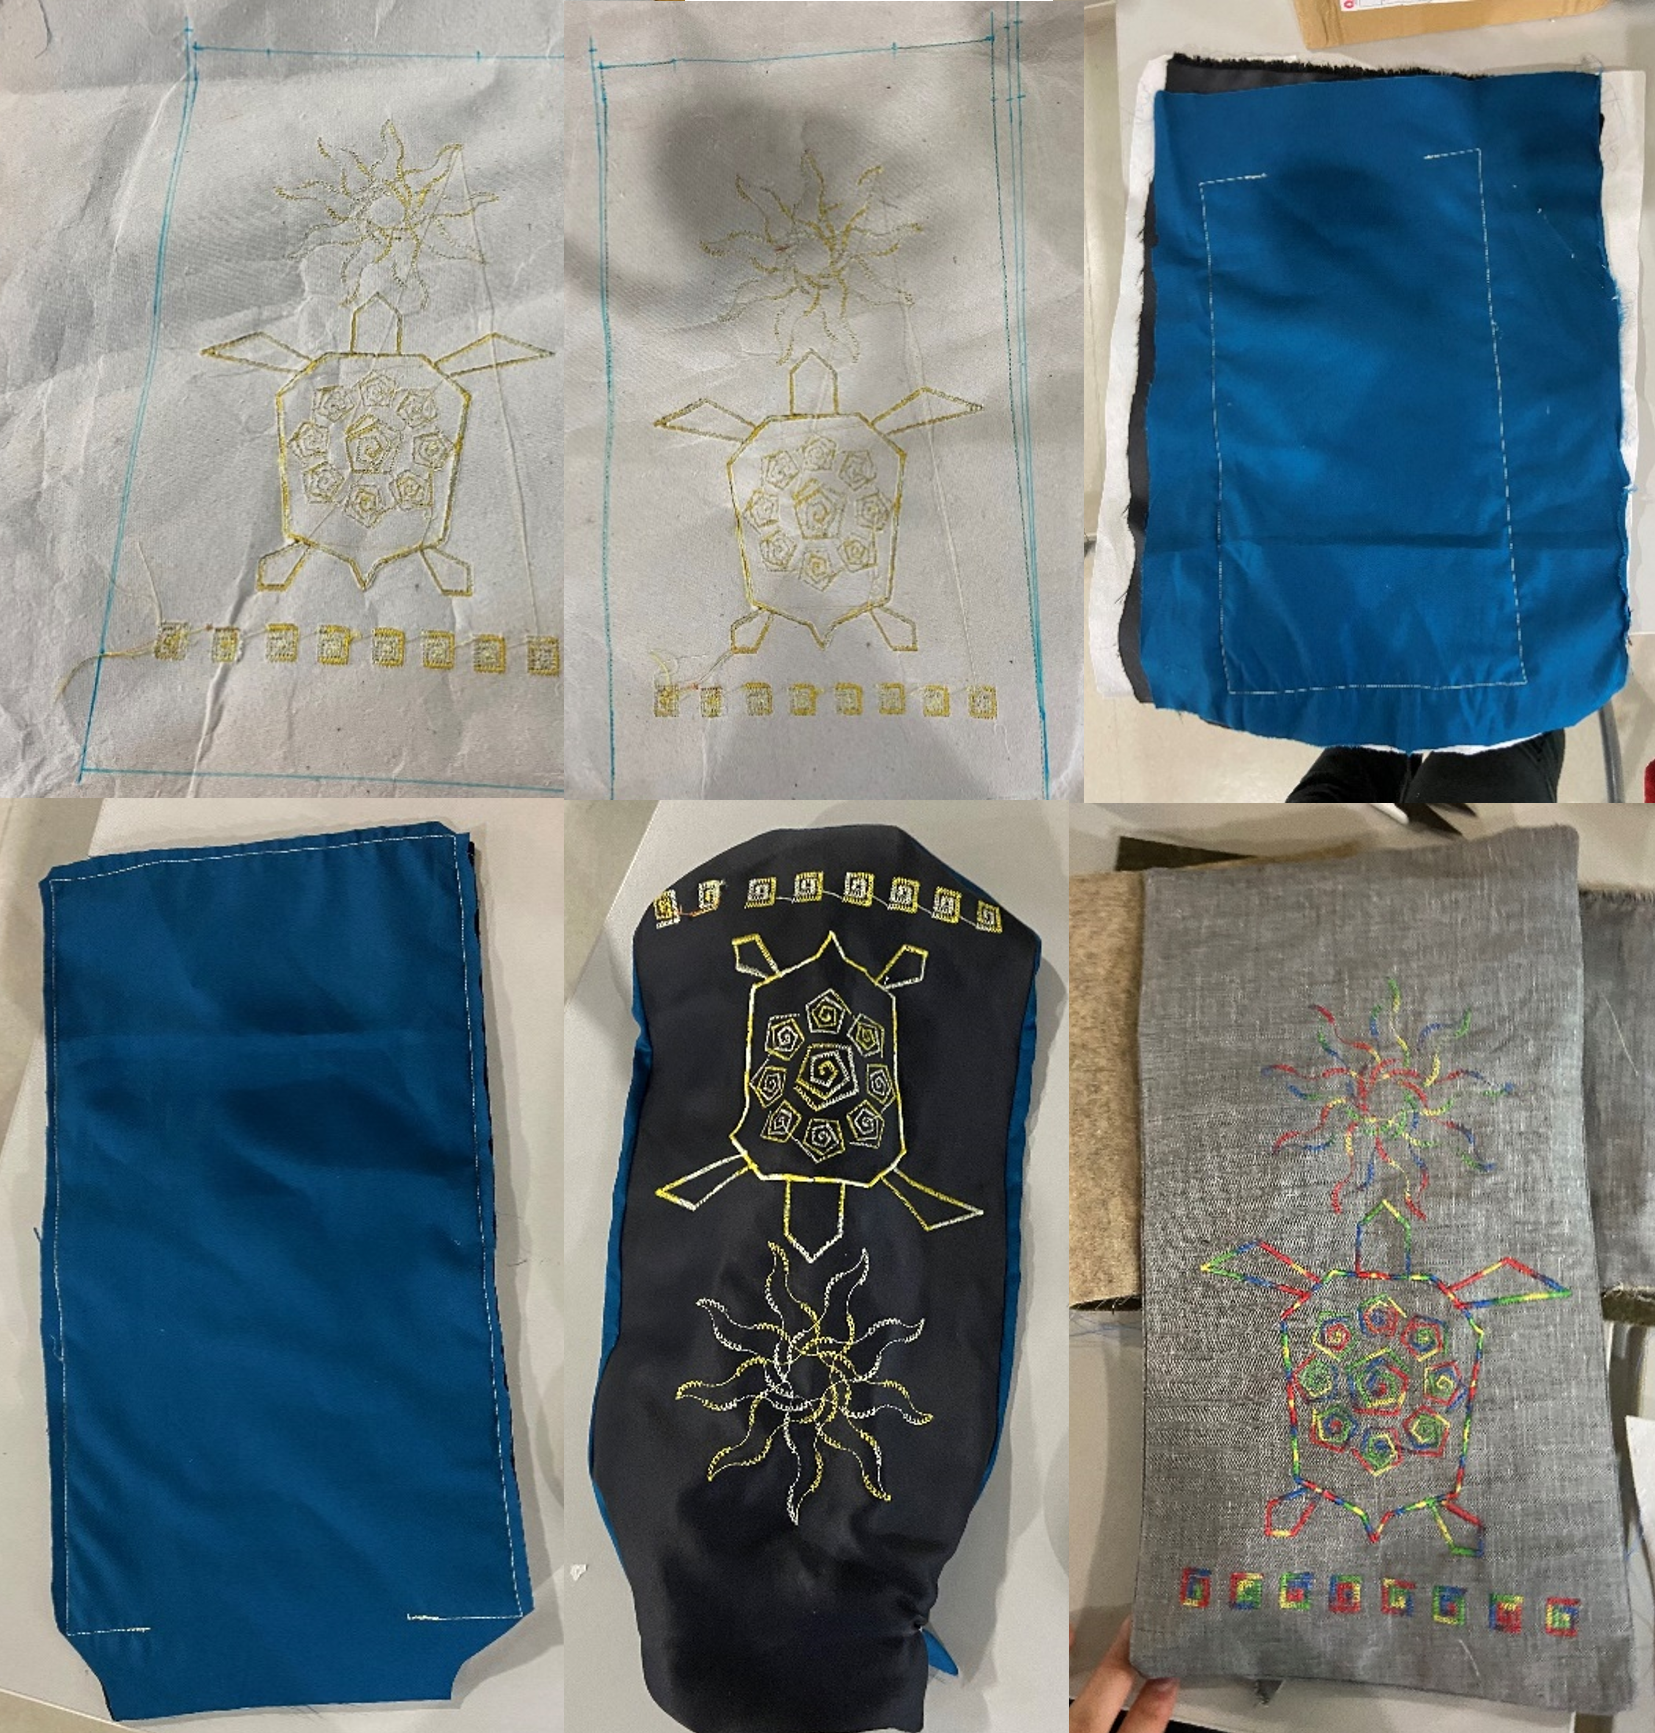
After troubleshooting, the process doesn't end there. Design adjustments are often necessary. Remember, the size of this page is just 18.5cm * 33cm, similar to the size of a keyboard, and there are three design works on a page. As shown in Figure below, my first draft of this stitch did not meet my expectations. The spirals were too thin, unlike the turtle's outline. Additionally, the turtle was too large, taking up the majority of the page, leaving no space for the other designs.
Final Embroidery: Design Iterations
Final Embroidery: Design Iterations
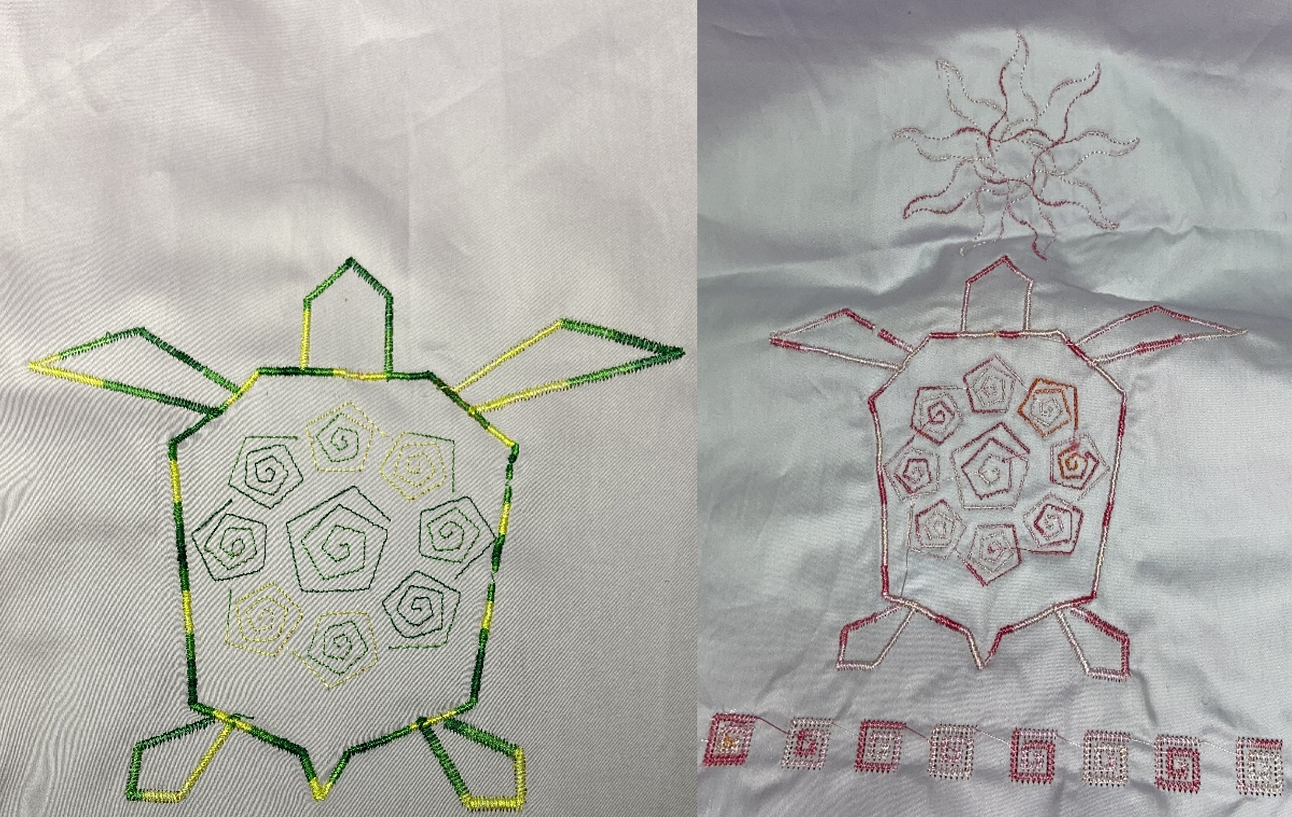
After the first draft of the turtle, I struggled to fix the issues until Professor Minsky suggested editing my original code. I realized that editing the original code is part of the iterative design process. After several edits, I finally achieved a sizable turtle and thicker line spirals. However, new problems arose. Tatami stitch didn't work well in small scale, causing thin lines in the spirals. The tension issues persisted, and the thick line style in Troi Simpson didn't differentiate well between thick and thin lines.
Surprisingly, cross-stitch, used in the square spirals, worked perfectly. In the third draft, I employed cross-stitch style in the turtle's spirals and in Troi Simpson. I also relocated the spirals inside the turtle to enhance thickness. The final draft, shown in Figure below, represents the result of these design iterations.
Stitching Challenges: Beyond Design
Stitching Challenges: Beyond Design
Some challenges mentioned earlier were addressed through redesigning and recoding. However, certain issues persisted due to the embroidery machine's mechanisms, thread quality, accidental blackouts, and thread shortages.
The biggest challenge was the need to monitor the entire stitching process to address issues promptly. Lack of knowledge about the return button, which could backtrack some stitch steps, meant redoing the entire process if any step went wrong. The dense tatami-style outline of the turtle caused material damage and needle breakage. Tension adjustments were crucial, with different threads performing differently and requiring specific tension levels.
Every issue manifested on the stitch page, and after extensive stitching, patterns of imperfect stitches became noticeable. Loose stitches were re-stitched using the return button, but due to a misaligned hook position, the re-stitched part ended up in the wrong position, resulting in skewing.
Throughout the creation of 9 stitch pages, 8 needles were broken, and 10 bottom bobbin threads were used up, highlighting the challenges beyond design in the embroidery process.
Stabilizers for Embroidery
Stabilizers for Embroidery
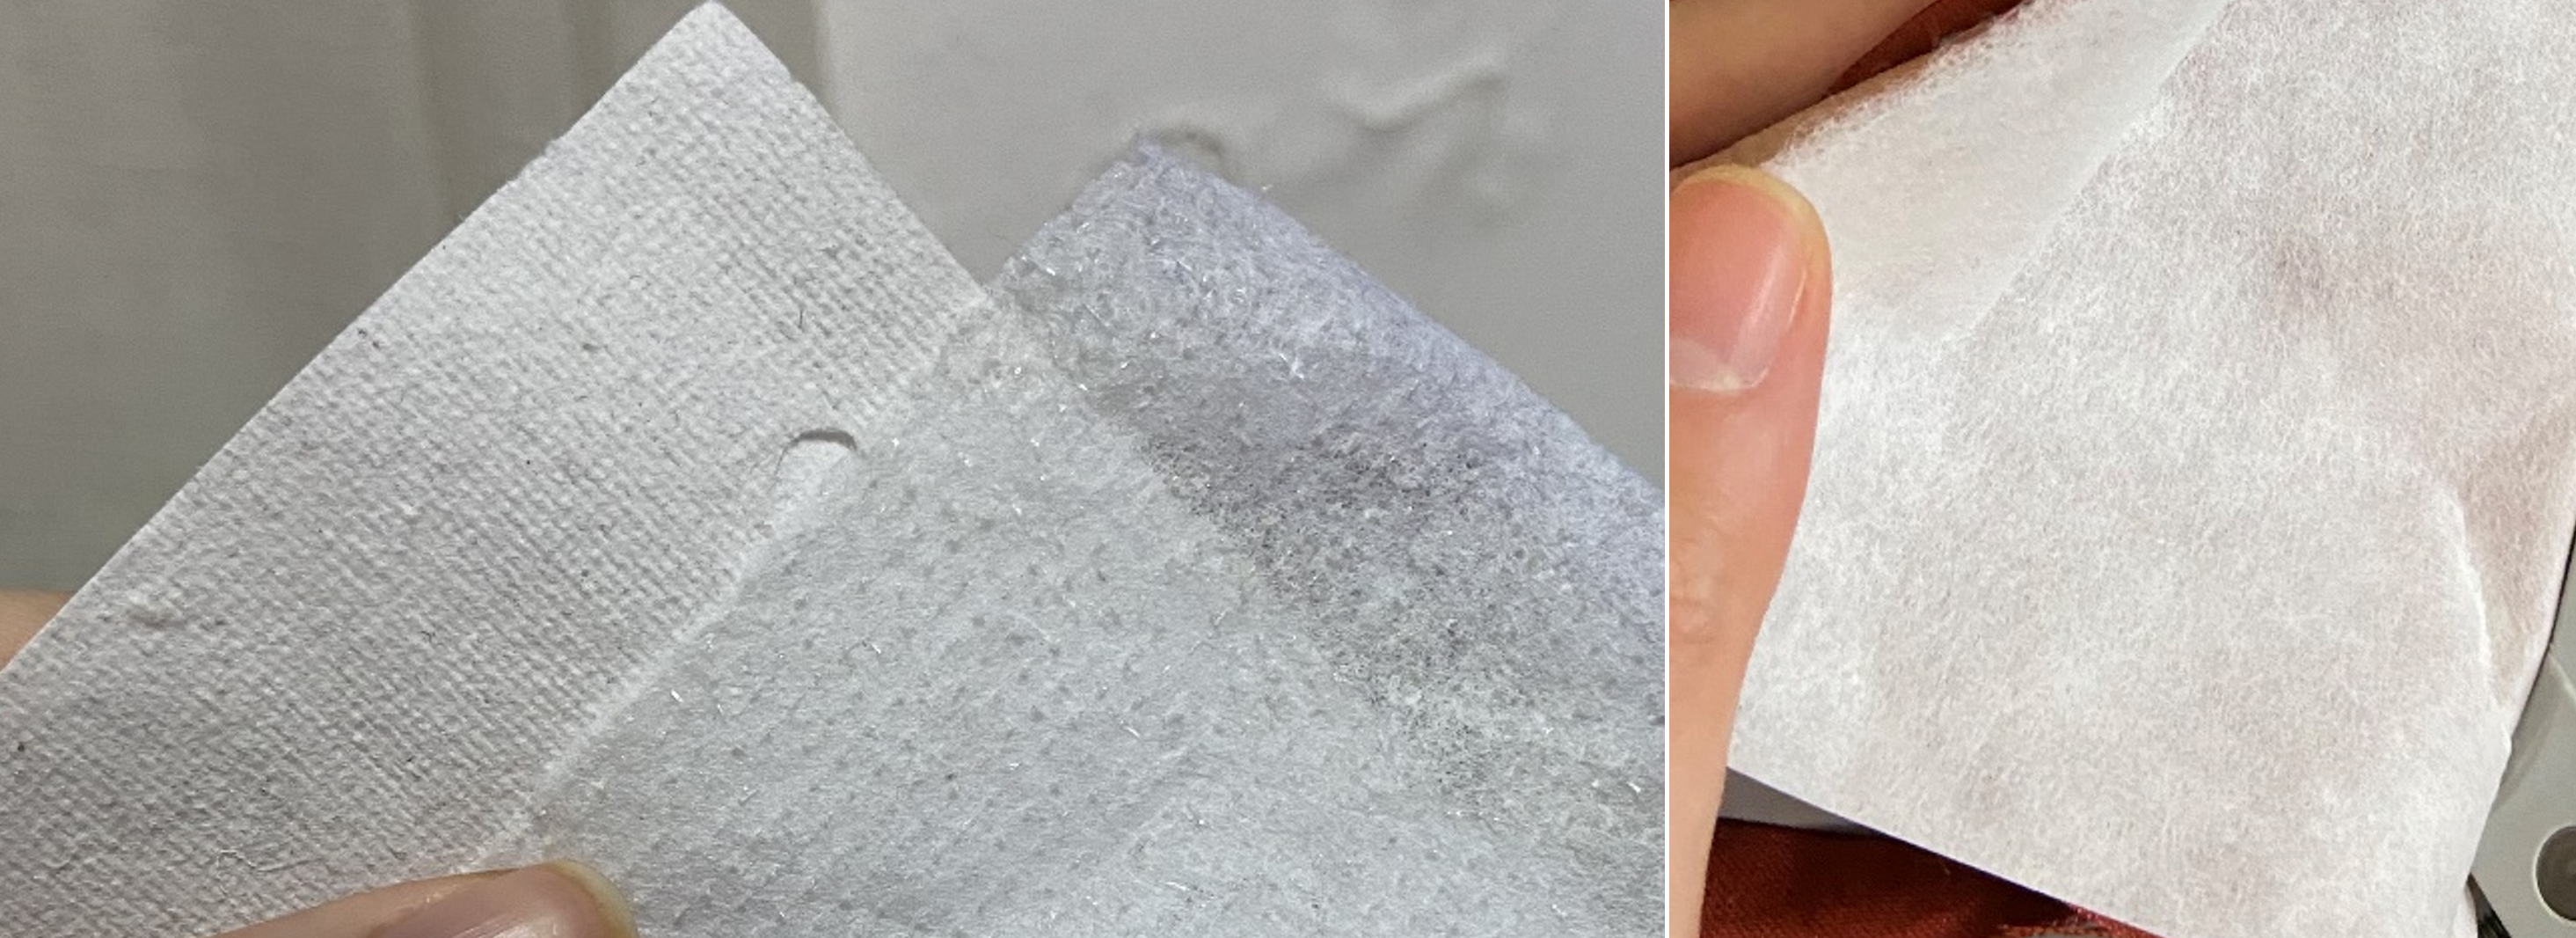
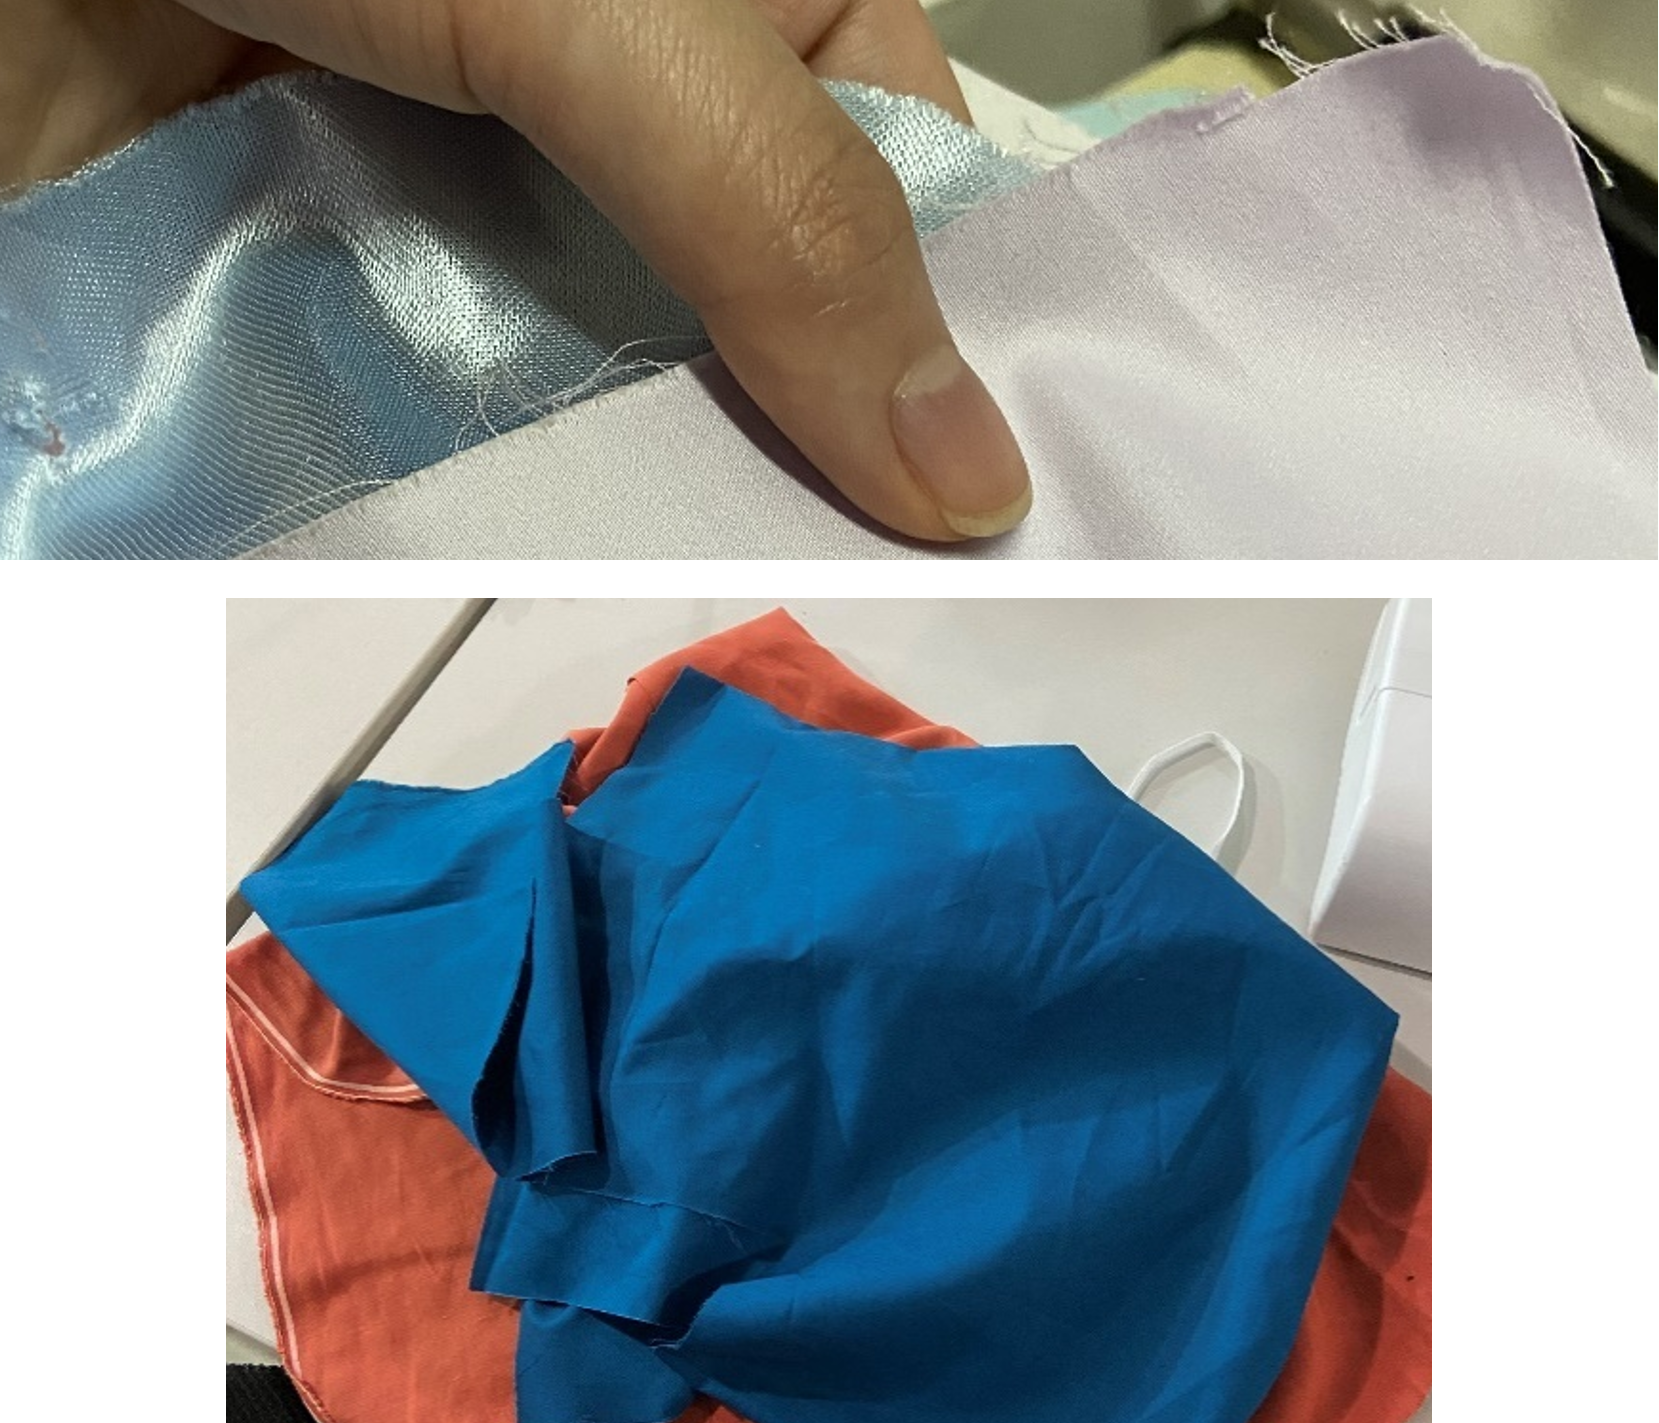
After experimenting with various fibers, I found that non-smooth fibers with low stretch work best for stitching. The ideal stabilizer has a smooth surface resembling paper. For the top thread, a smooth texture is preferred, while the bottom thread should be thin and rough. Proper preparation includes tightening the hook, ensuring the fiber and stabilizer are flat before stitching. Figure below showcases some stabilizers used in this project, while the Figure below the next figure displays various fibers utilized.
Book Design and Handcraft
Book Design and Handcraft
Book Design and Handcraft
This project surprisingly took us too long to finish, and when the scheduled due date arrived, we hadn't even started working on the book cover. With only three local students, Professor Minsky and the three of us had to collaborate to complete the book cover. Professor took one copy of each group's work and created the first draft of the swatch book.

Book Cover Design Process
Book Cover Design Process
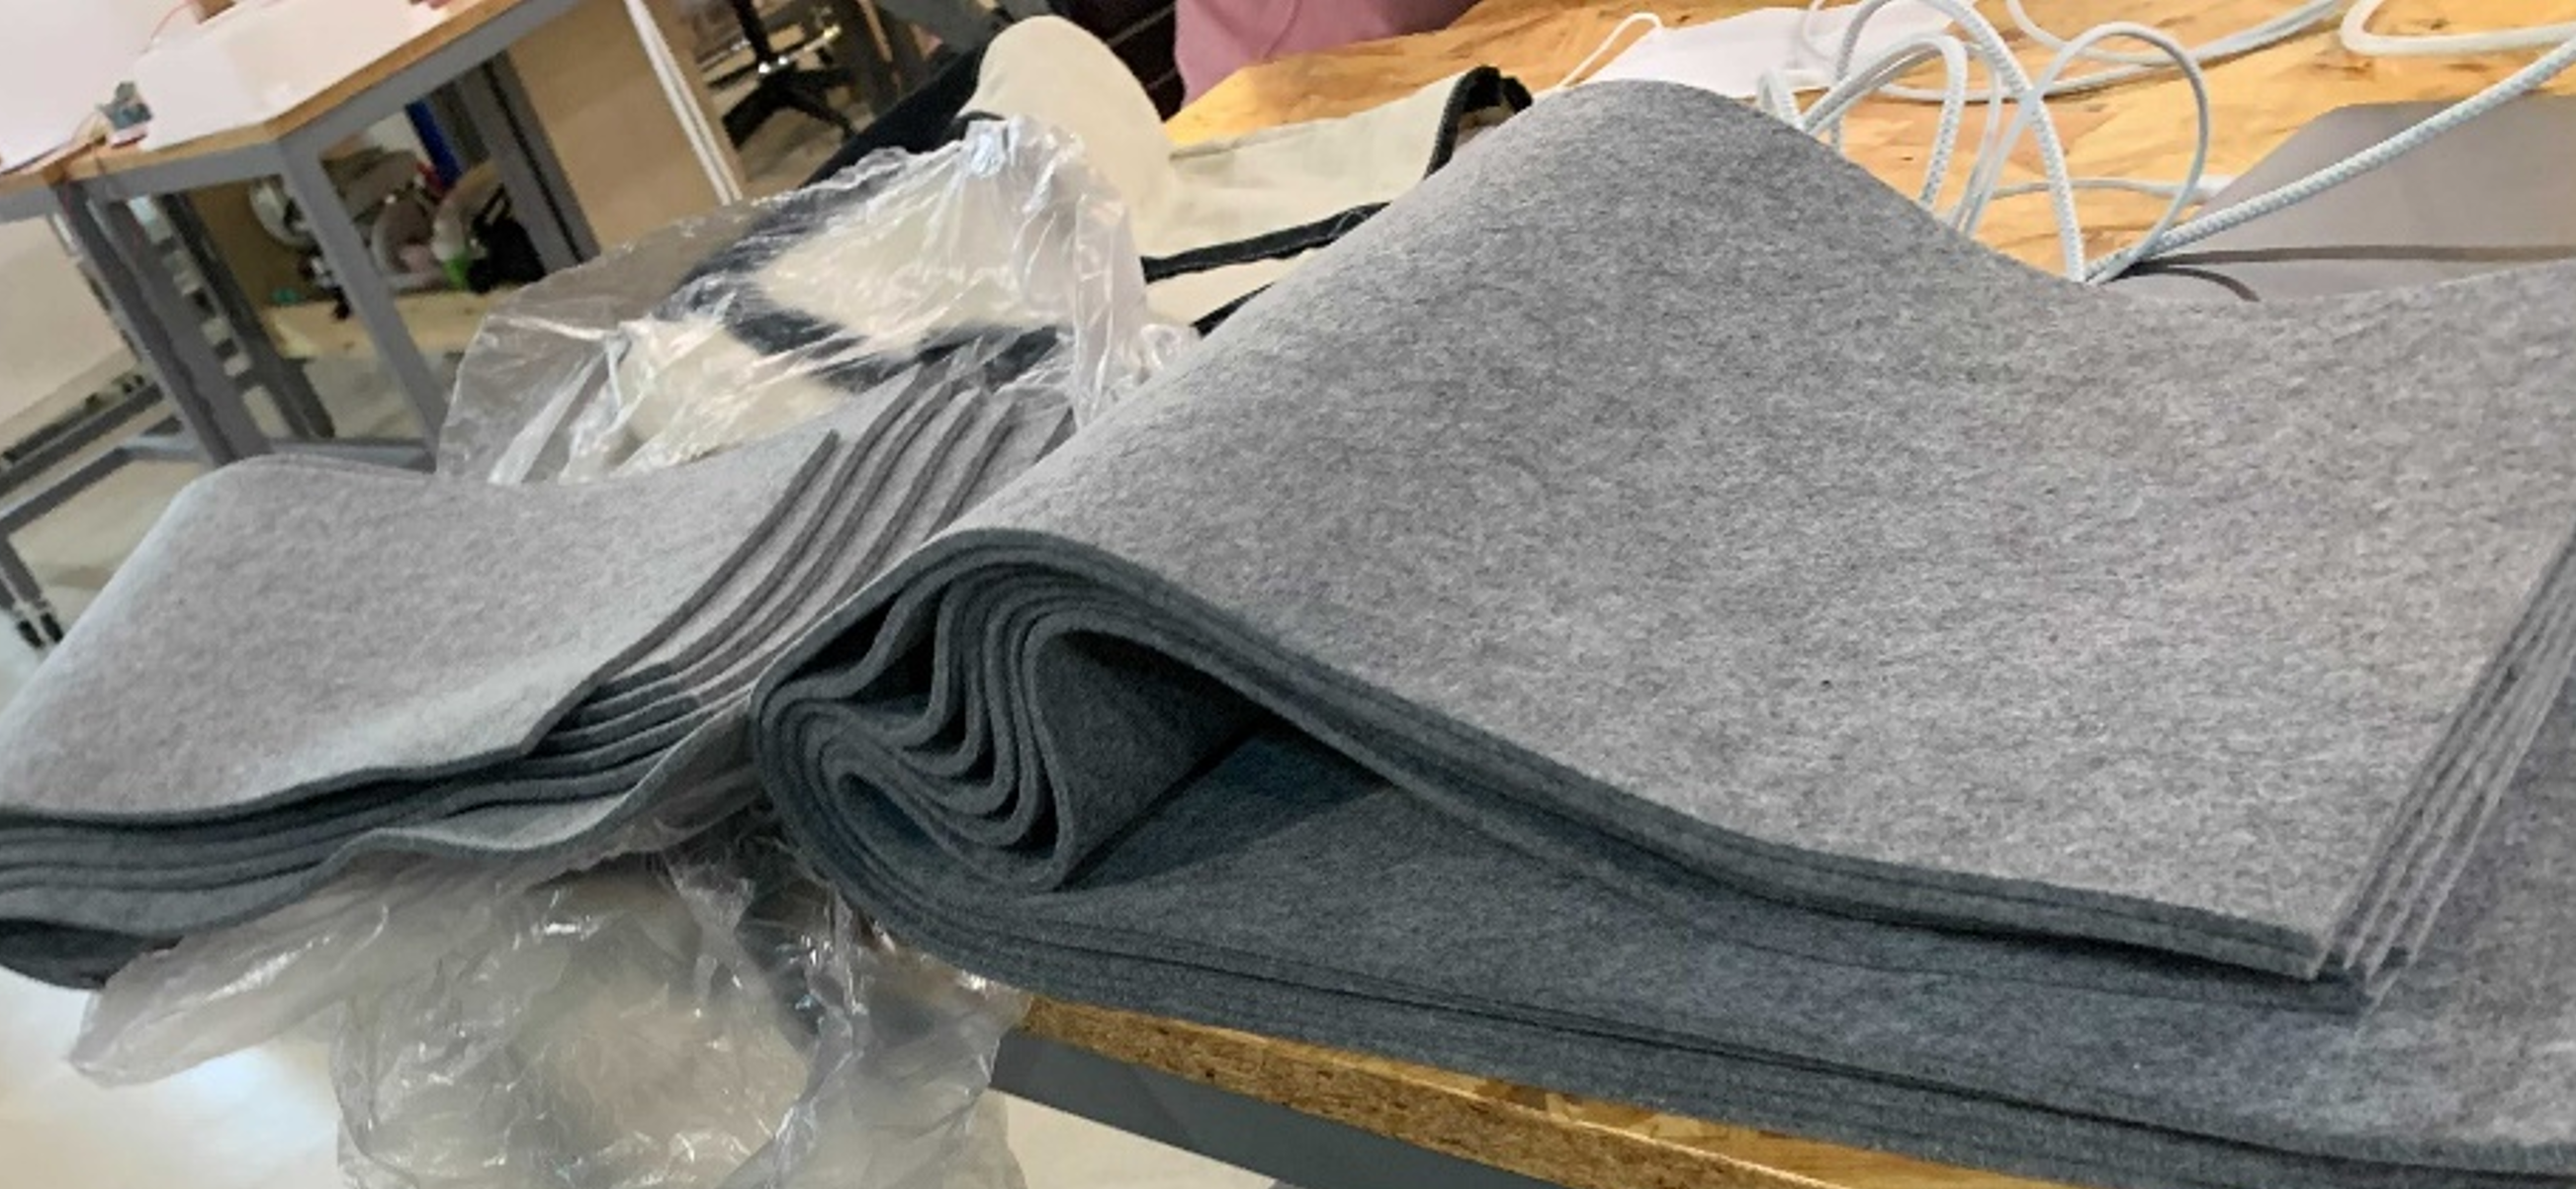
For the cover material, we opted for thick wool felt, finding it more suitable than the soft non-woven fiber used in the initial draft. After selecting the cover fiber, we discovered that the material could be stretched easily horizontally but not as much vertically. Tests with vertically and horizontally cut pieces showed that the vertically cut piece transformed more, leading us to decide on cutting every book cover horizontally from the raw material.
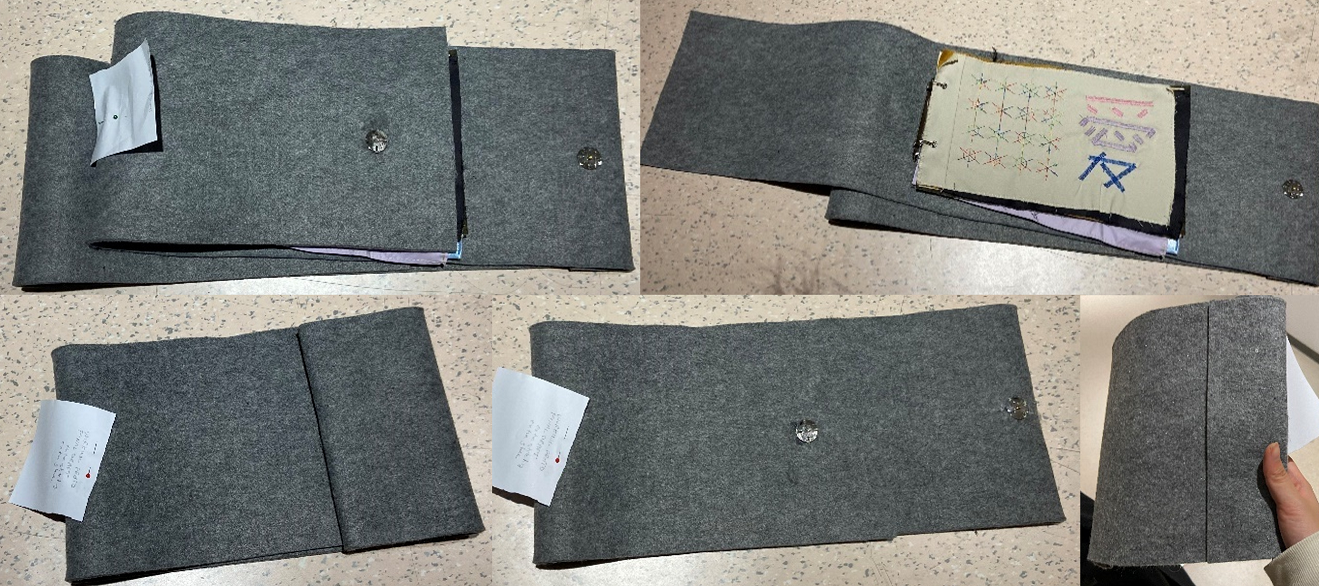
The design of the book adopted the idea of a roll-up shape from the partial first draft. The left side of the cover would be long enough to hide the pages, creating a mysterious feel for the reader. The pages would be held by a binder ring, and holes would be punched on each page. The right side would be long enough to partially overlap the left side, with snaps installed on the overlapped parts. The leftover on the right side would be rolled up again as a decoration indicating the presence of a snap. We glued the binder ring and snaps onto the fiber for stability, using hot glue for the best results.
With Professor Minsky's guidance, we made design decisions about the book cover, addressing issues such as the amount of glue under the binder ring and snaps, as well as the folding of the right part for aesthetic appeal. The final book cover design measures 96cm * 22cm.
Book Cover Paper Prototype
Book Cover Paper Prototype
After the last draft, we decided to create a paper prototype to determine the dimensions and positions of each part of the book cover. Despite the limitations of ruler length and paper size, resulting in approximately 2mm errors, the process was educational. I learned the importance of testing tools before use to achieve perfect cuts. While making the paper prototype, we faced challenges when transitioning to cutting the actual wool material, especially with 5mm thick wool, where achieving a straight line proved difficult.
Realizing the struggle with cutting the wool, and concerned about material wastage due to uneven edges, we brainstormed and decided to inquire with the wool material vendor if they could cut it for us. Fortunately, the vendor agreed, leading to the creation of a perfect book cover, as shown in Figure below.
Pillow-Like Stitch Page
Pillow-Like Stitch Page
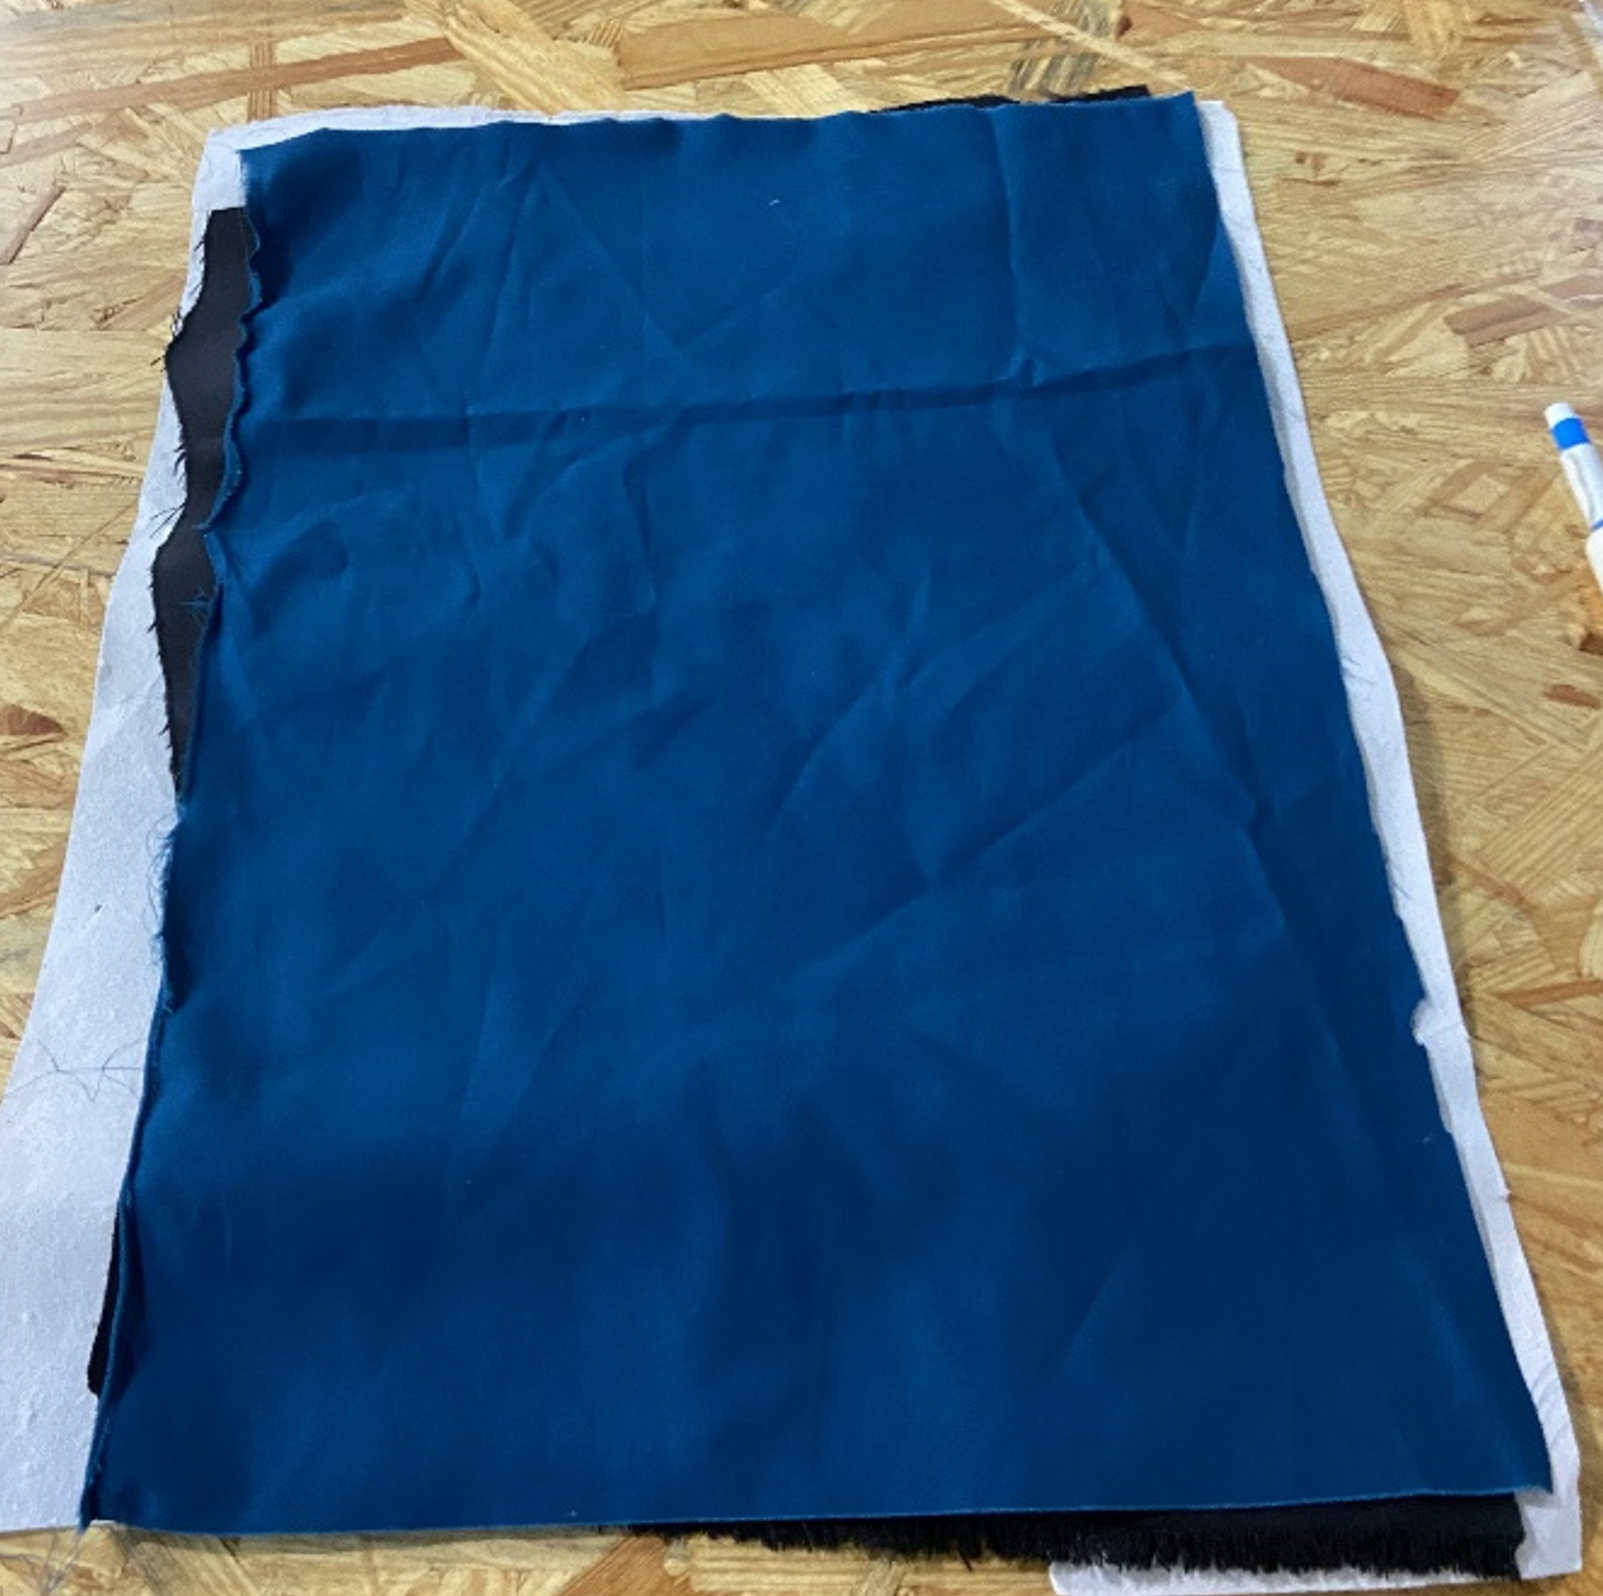
After designing the book cover, we needed to enhance the design of our pages. To avoid exposing the bottom bobbin and the mess caused by tatami stitches at the back of the page, I decided to use a technique where two pieces of fiber are stitched together like a pillow. The first step in creating this "pillow"-like page involved cutting another fiber of a slightly larger size than the page dimension (18.5*33cm). I then determined which side was the fine side to show others and placed this fine side of the fiber facing the front side of the stitch, as shown in Figure below.
Page Cutting and Turning
Page Cutting and Turning
After drawing the dimensions on the stabilizer, I proceeded to create the page in the exact required size. I cut all the corners of the design and trimmed 1 cm away from the stitched line. Then, I turned the inner side out, exposing the stitch side. Finally, I ironed the stitch to make the page flat and neat, as shown in Figure below.
Metal Hole Punch
Metal Hole Punch
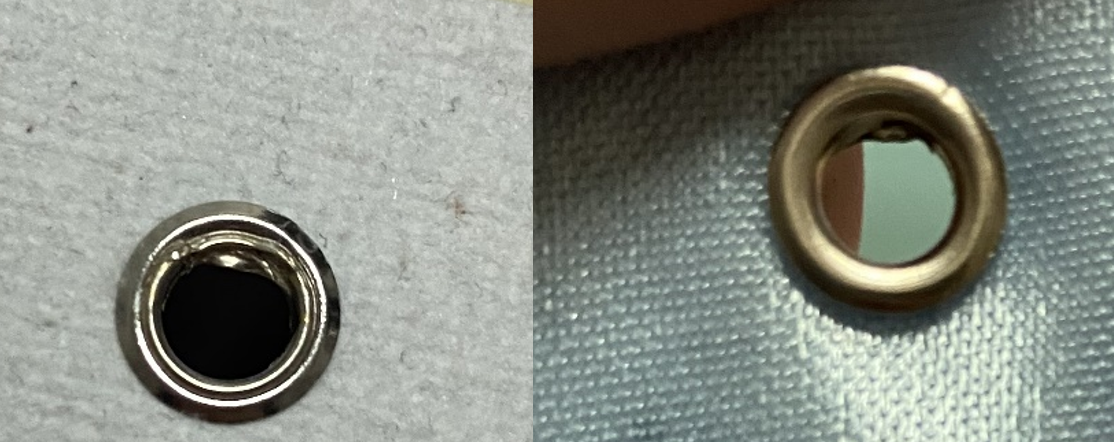
In the final stage of this project, we needed to punch holes in the pages for the binder ring. In the first draft of our hole design, Professor Minsky used wool material to make rings and glued them around the hole, which was punched by a book hole puncher. However, it was challenging to punch the tough wool material with a tool designed for paper. Creating rings from wool was also difficult. I attempted to stitch around the hole to protect it, but the high-density stitches around a tiny ring caused issues. After some online research, I discovered that a metal buckle could serve as a viable solution. We borrowed Professor Michela's professional hole puncher, and after several tests, the metal hole proved to be effective, as shown in Figure 18.
Metal Hole Punch
Conclusion
At the beginning of this project, I did not have much experience with the design process. While I had participated in projects with deadlines that allowed for iterations, the true essence of the design process didn't resonate strongly with me. However, in this project, I discovered that I learned a great deal about design. I meticulously tested every aspect before initiating any action, sought feedback from various individuals, and collaborated with Professor Minsky, gaining valuable insights from her expertise. Problem-solving played a crucial role in the design process, but not every issue could be resolved perfectly. Compromises were necessary for certain challenges. If this project were extended, I envision delving deeper into cover design. The current cover is a plain grey with no pattern. I express my gratitude to every go-local student and Professor Minsky. I thoroughly enjoyed this project.
Design Work on Turtlestitch
- 1. Square Spiral by Yuchen Li
- 2. Turtle Sizable by Yuchen Li
- 3. Troi Simpson
- ·Remixed version from Siggraph19
- ·Derived from Sun variation by chmod
- ·Turtle Art Example of "Turtle Geometry" from Hal Abelson and Andrea A. DiSessa 1986